Preparing a New Theme Without Access to the Sources
In this case the easiest way of preparing a new theme is to download one of the existing themes light/dark. This can be done in a few different ways. We’ll describe here two possible ways of downloading enabled themes.
Download Theme Using the Browser
- Open KKP UI
- Open
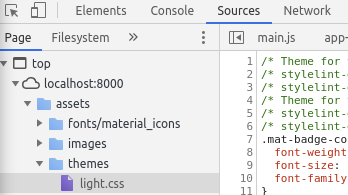
Developer toolsand navigate toSourcestab. - There should be a CSS file of a currently selected theme available to be downloaded inside
assts/themesdirectory.

Download Themes Directly From the KKP Dashboard container
Assuming that you know how to exec into the container and copy resources from/to it, themes can be simply copied over to your machine
from the running KKP Dashboard container. They are stored inside the container in dist/assets/themes directory.
Kubernetes
Assuming that the KKP Dashboard pod name is kubermatic-dashboard-5b96d7f5df-mkmgh you can copy themes to your ${HOME}/themes directory using below command:
kubectl -n kubermatic cp kubermatic-dashboard-5b96d7f5df-mkmgh:/dist/assets/themes ~/themes
Docker
Assuming that the KKP Dashboard container name is kubermatic-dashboard you can copy themes to your ${HOME}/themes directory using below command:
docker cp kubermatic-dashboard:/dist/assets/themes/. ~/themes
Using Compiled Theme to Prepare a New Theme
Once you have a base theme file ready, we can use it to prepare a new theme. To easier understand the process, let’s
assume that we have downloaded a light.css file and will be preparing a new theme called solar.css.
Rename
light.csstosolar.css.Update
solar.cssfile according to your needs. Anything in the file can be changed or new rules can be added. In case you are changing colors, remember to update it in the whole file.Mount new
solar.cssfile todist/assets/themesdirectory inside the application container. Make sure not to override whole directory.Update
config.jsonfile insidedist/configdirectory and register the new theme.{ "openstack": { "wizard_use_default_user": false }, "share_kubeconfig": false, "themes": [ { "name": "solar", "displayName": "Solar", "isDark": true } ] }
That’s it. After restarting the application, theme picker in the Account view should show your new Solar theme.