The Kubeflow Addon (Flowmatic) allows automated installation of Kubeflow Machine Learning Toolkit for Kubernetes in KKP, with Kubeflow authentication integrated with KKP.
The Kubeflow Addon is still under development, the current version is just a feature preview.
Prerequisites
Before installing the Kubeflow Addon in a KKP user cluster, the following prerequisites have to be met:
KKP Version & Features
This addon works with KKP version 2.16+, in user clusters with Service Account Token Volume Projection feature enabled. KKP clusters with Kubernetes version v1.20+ have this feature automatically enabled, in KKP clusters with older versions of Kubernetes this feature has to be enabled explicitly, as described in the KKP Documentation.
Installing Kubeflow Addon in KKP
Before this addon can be deployed in a KKP user cluster, the KKP installation has to be configured to enable Kubeflow as an accessible addon. This needs to be done by the KKP installation administrator, once per KKP installation.
- Request the KKP addon Docker image with Kubeflow Addon matching your KKP version from Kubermatic (or build it yourself from the Flowmatic repository).
- Configure KKP - edit
KubermaticConfigurationas follows:- modify
spec.userClusters.addons.kubernetes.dockerRepositoryto point to the provided addon Docker image repository, - add
kubeflowintospec.api.accessibleAddons.
- modify
- Apply the AddonConfig from the Flowmatic repository in your KKP installation.
Kubeflow System Requirements
For deploying Kubeflow in a KKP user cluster, please make sure that the cluster meets the minimum system requirements for running Kubeflow.
If your machine learning workloads require GPU acceleration, make sure you are using GPU-enabled machines when creating a user cluster. For more details about GPU support, please refer to the GPU Acceleration Settings section below.
Deploying Kubeflow Addon in a KKP User Cluster
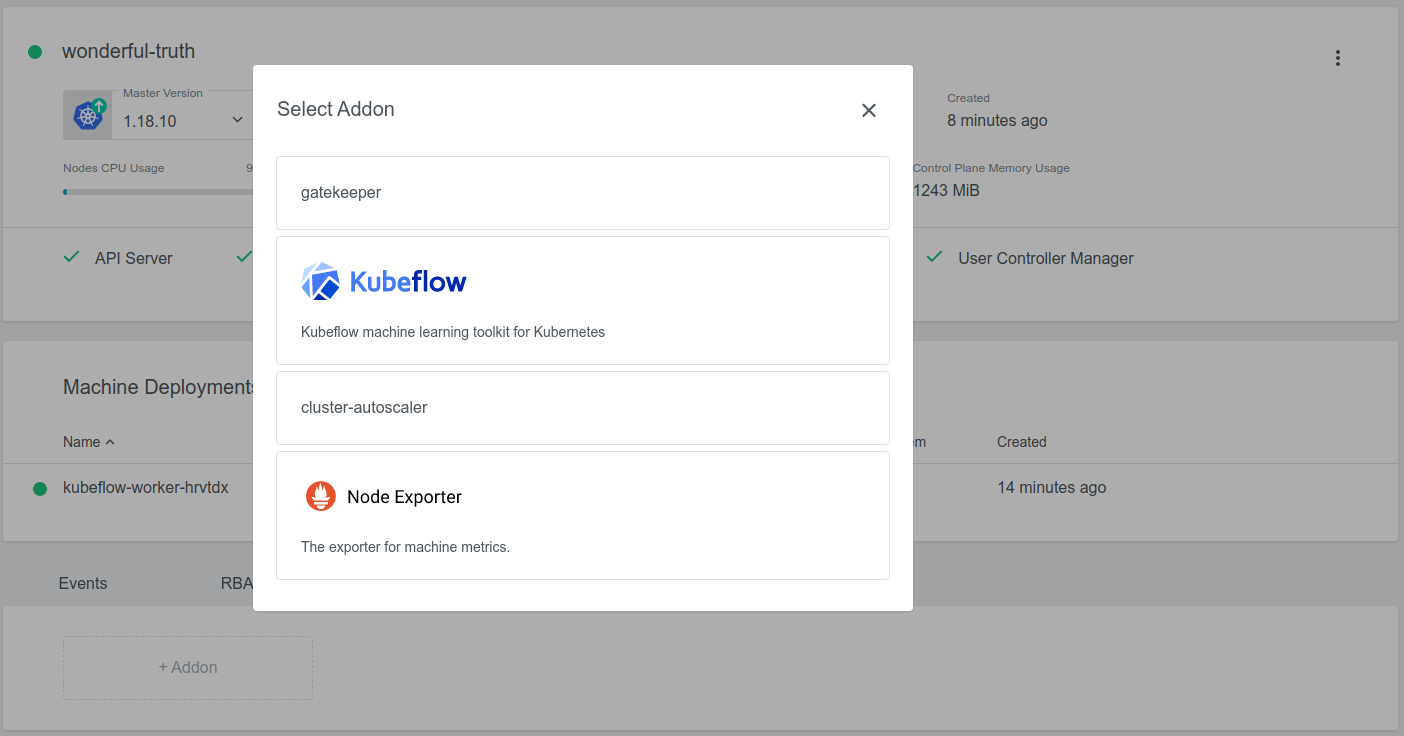
Once the Kubeflow Addon is installed in KKP, it can be deployed into a user cluster via the KKP UI as shown below:

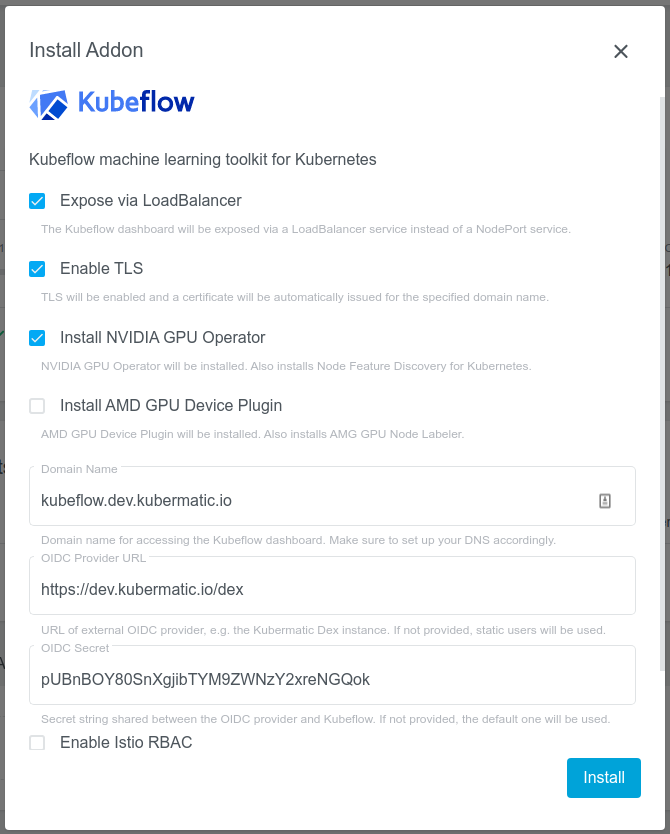
The UI will provide several options that can be used to customize the Kubeflow installation, as shown below.

These options will be described in detail in the following section.
Kubeflow Addon Options
Expose via LoadBalancer
By default, the Kubeflow dashboard is only accessible via a k8s NodePort service. This can be changed by enabling the
option Expose via LoadBalancer, which exposes the Kubeflow dashboard using a LoadBalancer k8s service.
For a LoadBalancer service, an external IP address will be assigned by the cloud provider at which the cluster is running.
This address can be retrieved by reviewing the istio-ingressgateway Service in istio-system Namespace, e.g.:
$ kubectl get service istio-ingressgateway -n istio-system
NAME                   TYPE           CLUSTER-IP      EXTERNAL-IP
istio-ingressgateway   LoadBalancer   10.240.28.214   a286f5a47e9564e43ab4165039e58e5e-1598660756.eu-central-1.elb.amazonaws.com
This external IP can be used to access the Kubeflow dashboard, or for DNS setup if custom Domain Name is used
(see the Domain Name section).
Enable TLS
By default, the connection to the Kubeflow dashboard is handled by insecure HTTP connection. To use secure HTTPS instead,
select the Enable TLS option. When selected, the addon will automatically request a TLS certificate for the specified
Domain Name (described in the Domain Name section) issued by the Let’s Encrypt
certificate authority, and it will use it to configure HTTPS for accessing the dashboard.
This option works only if the Expose via LoadBalancer option is enabled and a custom Domain Name is set.
Domain Name
To access the Kubeflow dashboard via a custom domain name specifically assigned to a particular Kubeflow installation,
use the Domain Name input box.
This setting configures the provided domain name on the Kubeflow side. To actually point that domain towards the proper
Kubernetes cluster and Service, a DNS record has to be created at your domain name service provider as well.
The domain name needs to be pointed to the external IP of the istio-ingressgateway Service in the
istio-system Namespace, e.g. using a CNAME DNS entry.
Expose via LoadBalancer has to be enabled to use a custom domain name.
OIDC Provider URL & Secret
By default, access into the Kubeflow dashboard is secured by basic authentication with static users.
Alternatively, an external OIDC authentication provider can be specified in the OIDC Provider URL with the secret
specified in OIDC Secret.
Since KKP already contains an OIDC provider to authenticate users logging into the KKP itself (Dex),
it is possible to point the Kubeflow addon to this KKP OIDC service. In case that your KKP runs on the domain:
https://kubermatic.company.com/, you can configure the OIDC provider as https://kubermatic.company.com/dex.
This setup however requires some configuration on the KKP platform side as well. The KKP installation administrator
has to add the following section into the KKP’s Helm values.yaml before installing the oauth chart
(see the Securing System Services documentation for more details):
dex:
  clients:
  - id: kubeflow-oidc-authservice
    name: kubeflow-oidc-authservice
    secret: <oidc-secret-passed-into-addon>
    RedirectURIs:
    - 'https://<kubeflow-installation-domain-name>/login/oidc'
GPU Acceleration Settings
To enable GPU (graphical processing unit) acceleration in a Kubeflow cluster, at least some of the nodes in the cluster need to have some GPU devices installed. Depending on the GPU device vendor (NVIDIA or AMD), the Kubeflow addon provides different options on how to enable them for k8s workloads.
Install NVIDIA GPU Operator
For NVIDIA GPUs, the Kubeflow addon provides automated installation of all necessary software components on the nodes
in the cluster using the NVIDIA GPU Operator,
by selecting the Install NVIDIA Operator option.
The NVIDIA GPU Operator will automatically take care of the installation of drivers, container runtime, and the k8s device plugin on all nodes, where NVIDIA GPUs are detected. This also works for any new nodes that join the cluster later.
Please review the NVIDIA GPU Operator Platform Support documentation to see which GPU models, operating systems and Kubernetes versions are supported.
Install AMD GPU Device Plugin
For AMD GPUs, the addon only provides automated installation of the AMD GPU device plugin, by selecting the
Install AMD GPU Device Plugin option.
The installation of GPU drivers on individual Kubernetes nodes is out of the scope of the device plugin - the drivers have to be installed in a different way (e.g. manually, or by using of a base node image with pre-installed AMD GPU drivers).
Please review the documentation of the AMD GPU device plugin for the driver installation instructions, prerequisites and limitations.
Enable Istio RBAC
By default, the Istio RBAC
(Role Based Access Control) enforcement will be disabled in the Kubeflow installation, to not hit RBAC-related issues
described in the Limitations & Known Issues section of this document. This however means
less separation between multiple Kubeflow users within the cluster. If the below listed known issue is not problematic
for your Kubeflow installation, you can still enable RBAC enforcement using the Enable Istio RBAC option.
Limitations & Known Issues
This section contains a list of known issues in different Kubeflow components:
Kubermatic Kubernetes Platform
- Not all GPU instances of various providers can be started from the KKP UI: https://github.com/kubermatic/kubermatic/issues/6433
Istio RBAC in Kubeflow:
- If enabled, this issue can be hit in the pipelines: https://github.com/kubeflow/pipelines/issues/4976
Kubeflow UI issues:
- Error by adding notebook server: 500 Internal Server Error: https://github.com/kubeflow/kubeflow/issues/5518
- Experiment run status shows as unknown: https://github.com/kubeflow/pipelines/issues/4972
Kale Pipeline:
- “Namespace is empty” exception: https://github.com/kubeflow-kale/kale/issues/210
NVIDIA GPU Operator
- Please see the official NVIDIA GPU documentation for known limitations: https://docs.nvidia.com/datacenter/cloud-native/gpu-operator/release-notes.html#operator-known-limitations
AMD GPU Support
- The latest AMD GPU -enabled instances in AWS (EC2 G4ad) featuring Radeon Pro V520 GPUs do not seem to be working with Kubeflow (yet). The GPUs are successfully attached to the pods but the notebook runtime does not seem to recognize them.