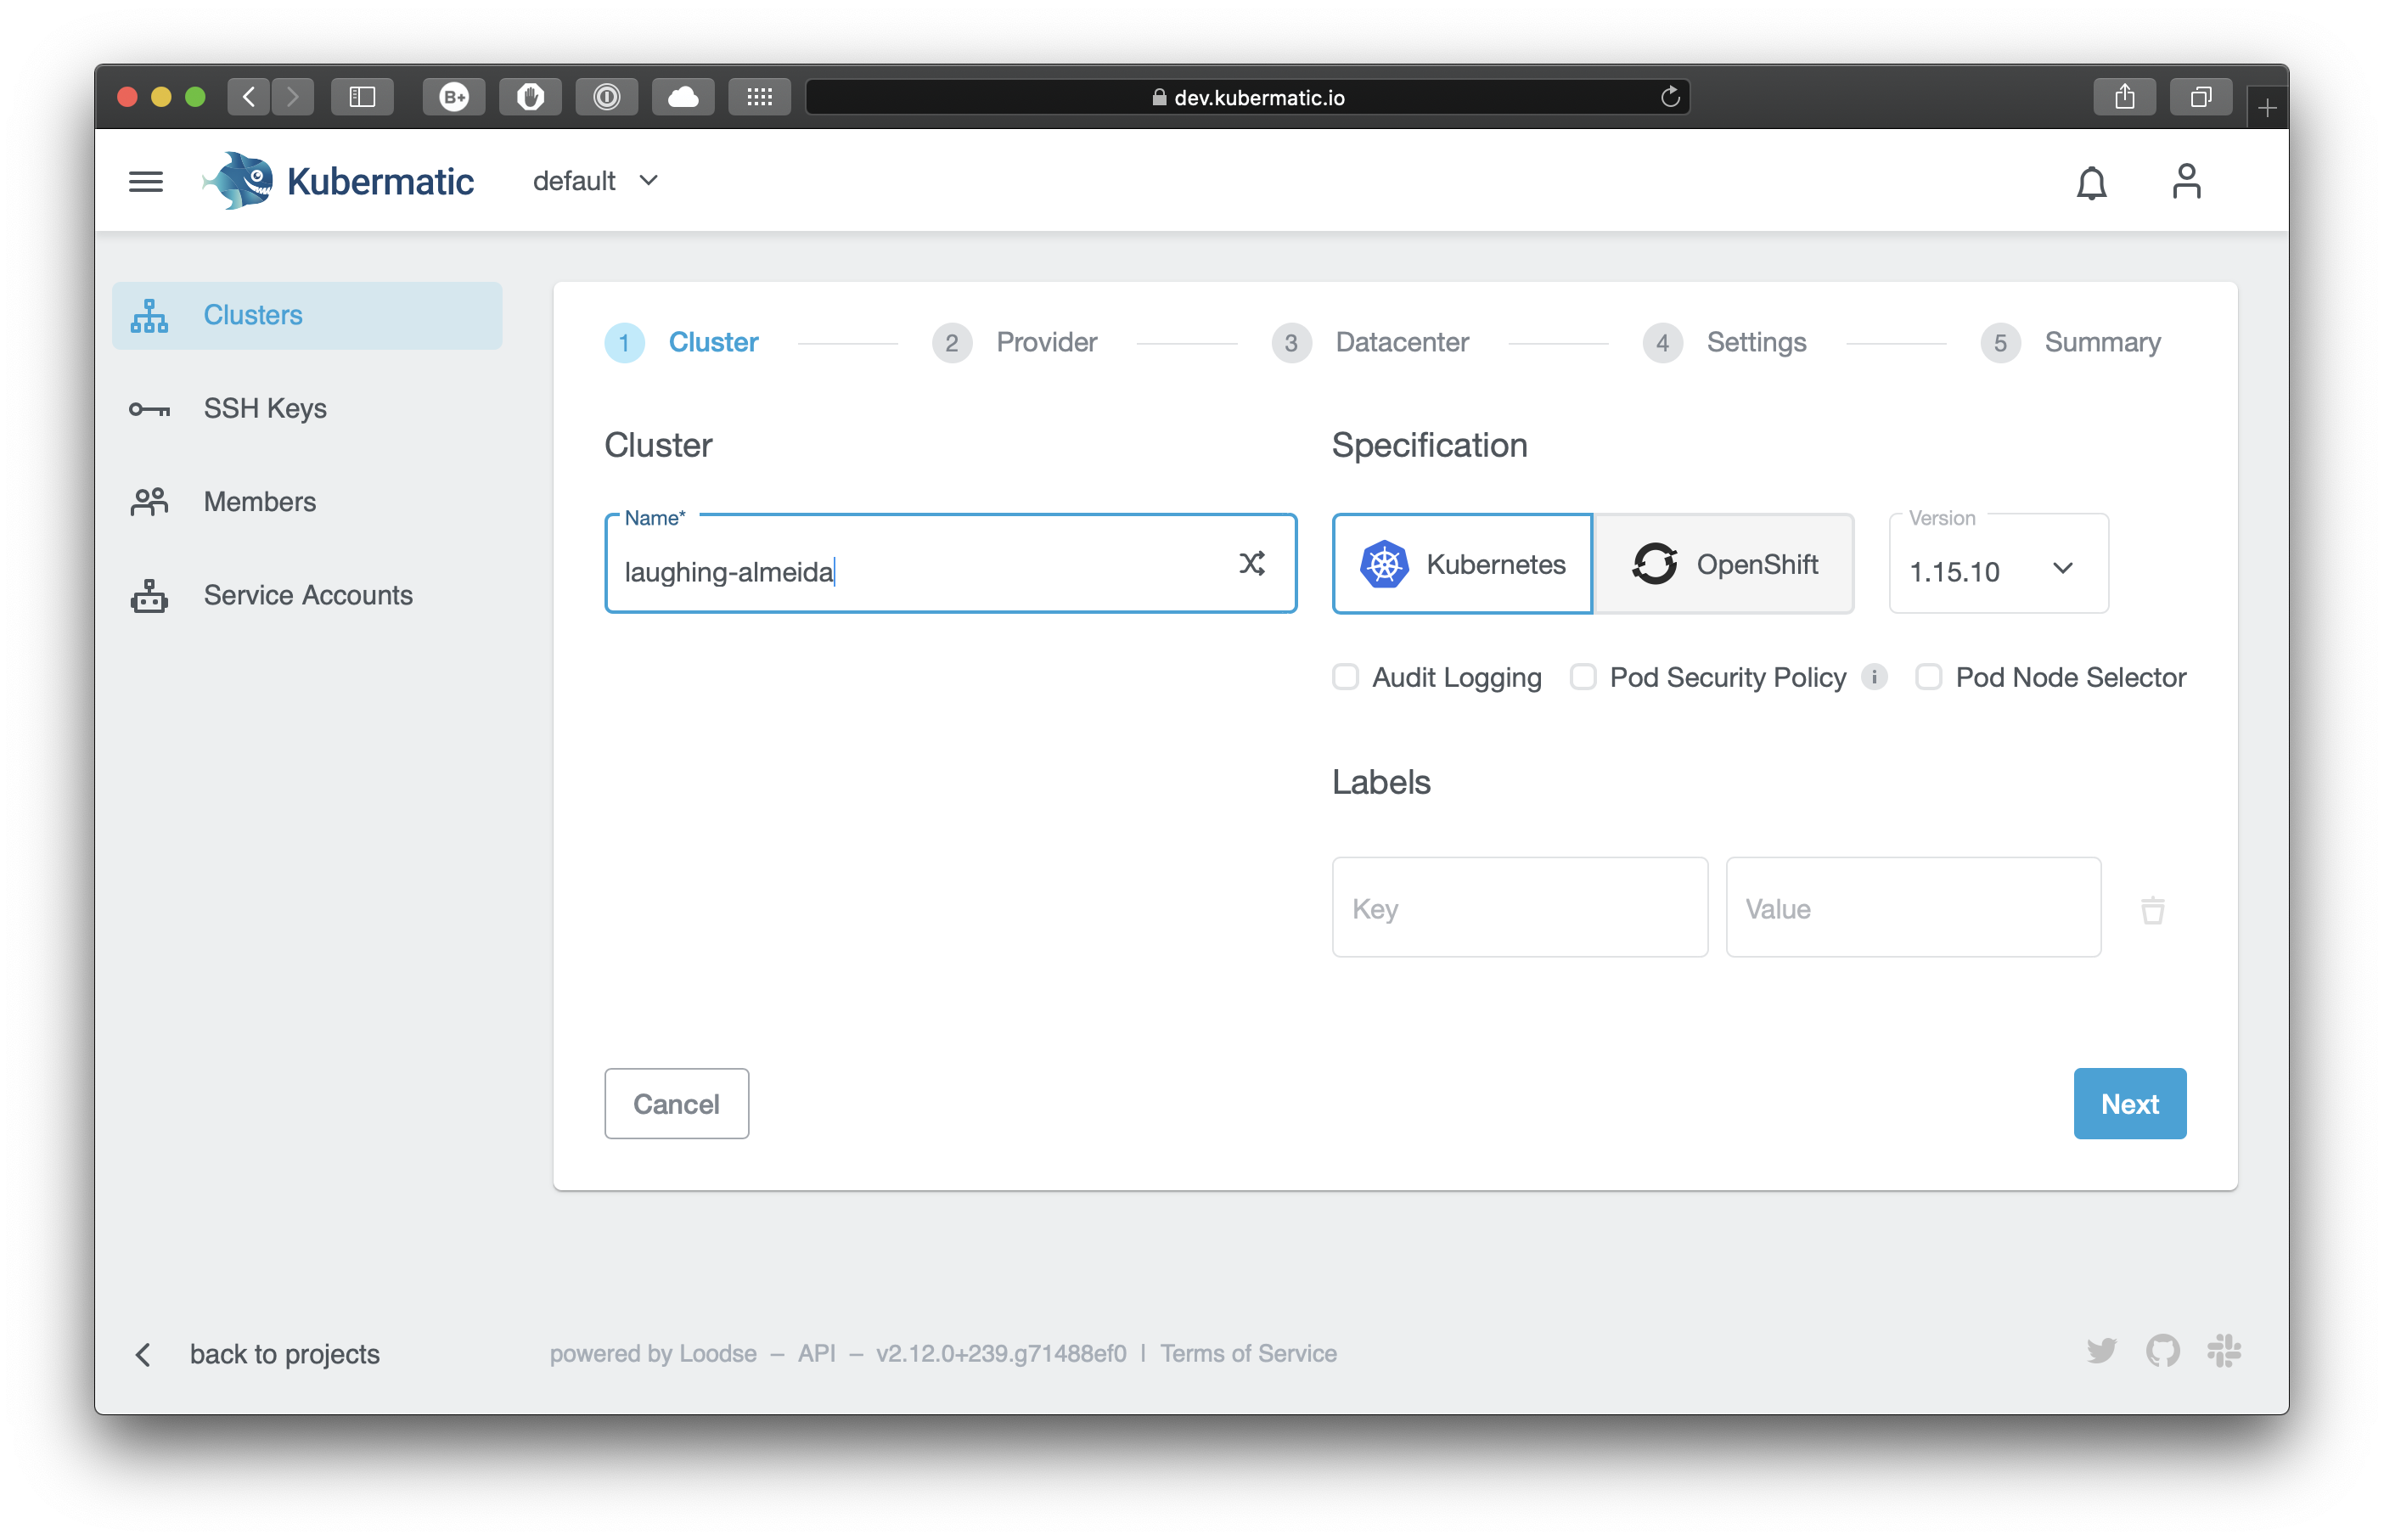
To create a new cluster, open the Kubermatic Kubernetes Platform (KKP) dashboard, choose a project, select the menu entry Clusters and click the button Add Cluster on the top right.
 Enter a name for your cluster and click Next. Here you can also activate Audit Logging and Pod Security Policy, assign labels to your cluster, and choose a Kubernetes version.
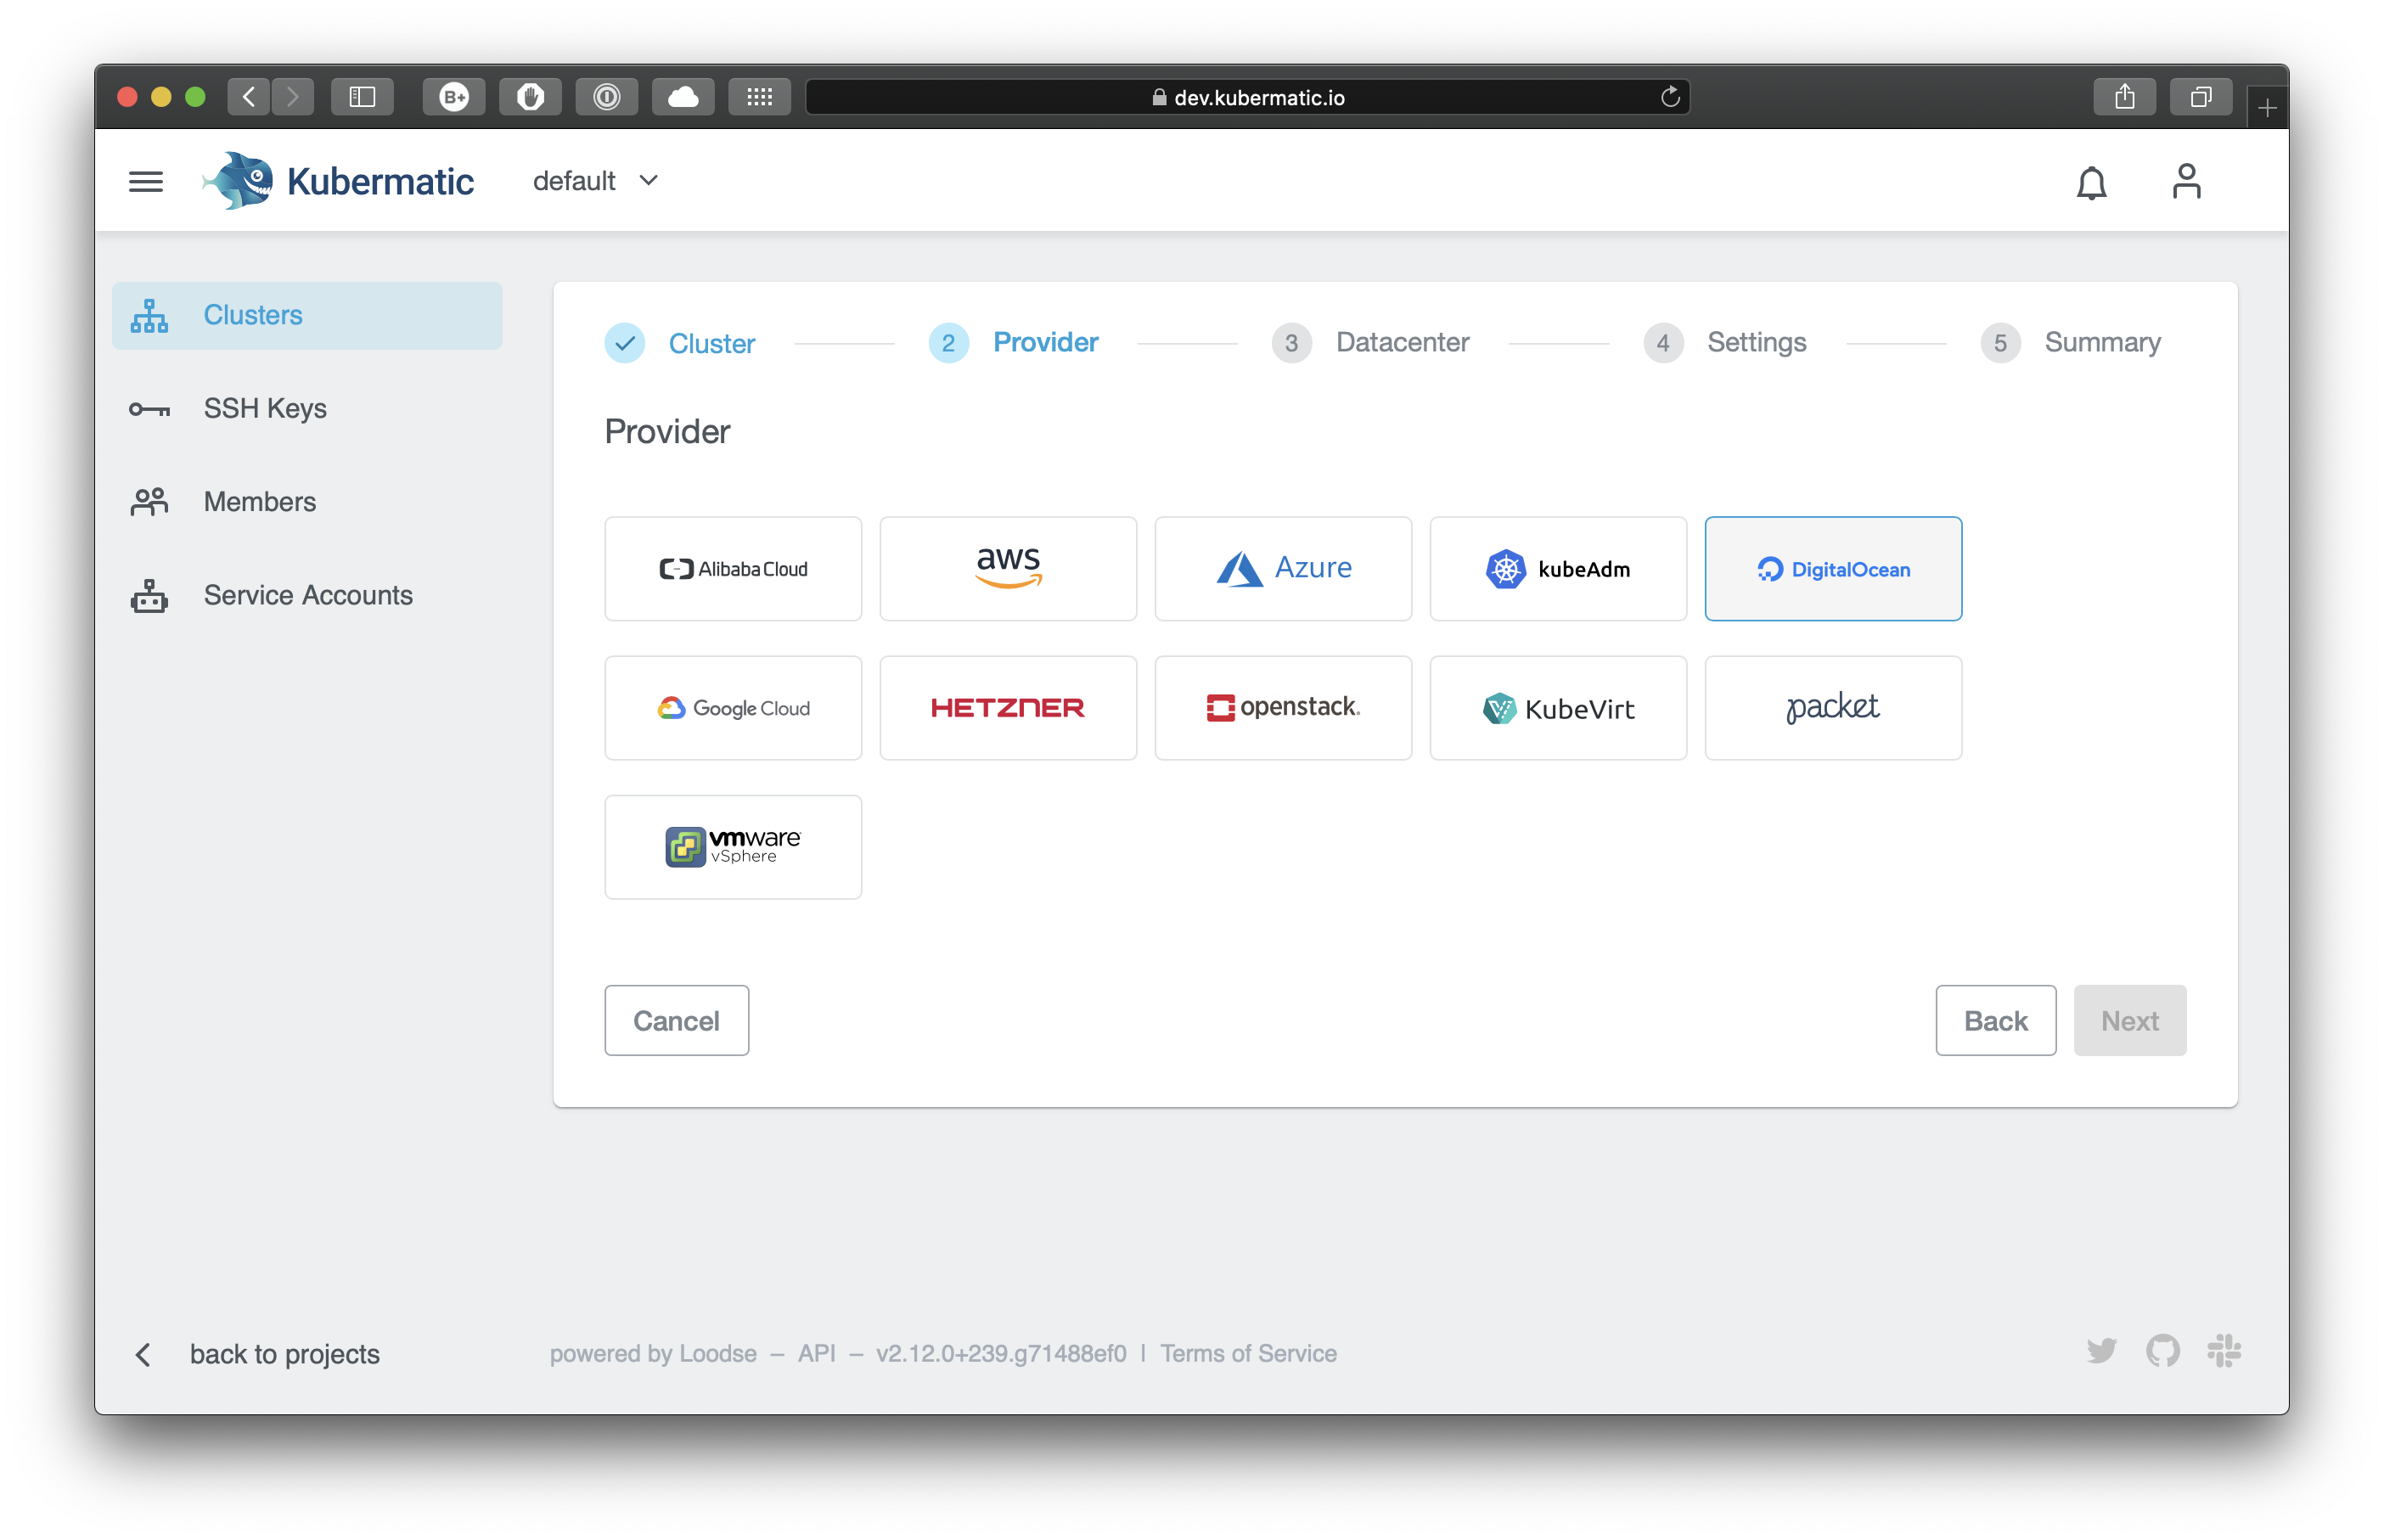
Choose the cloud provider:
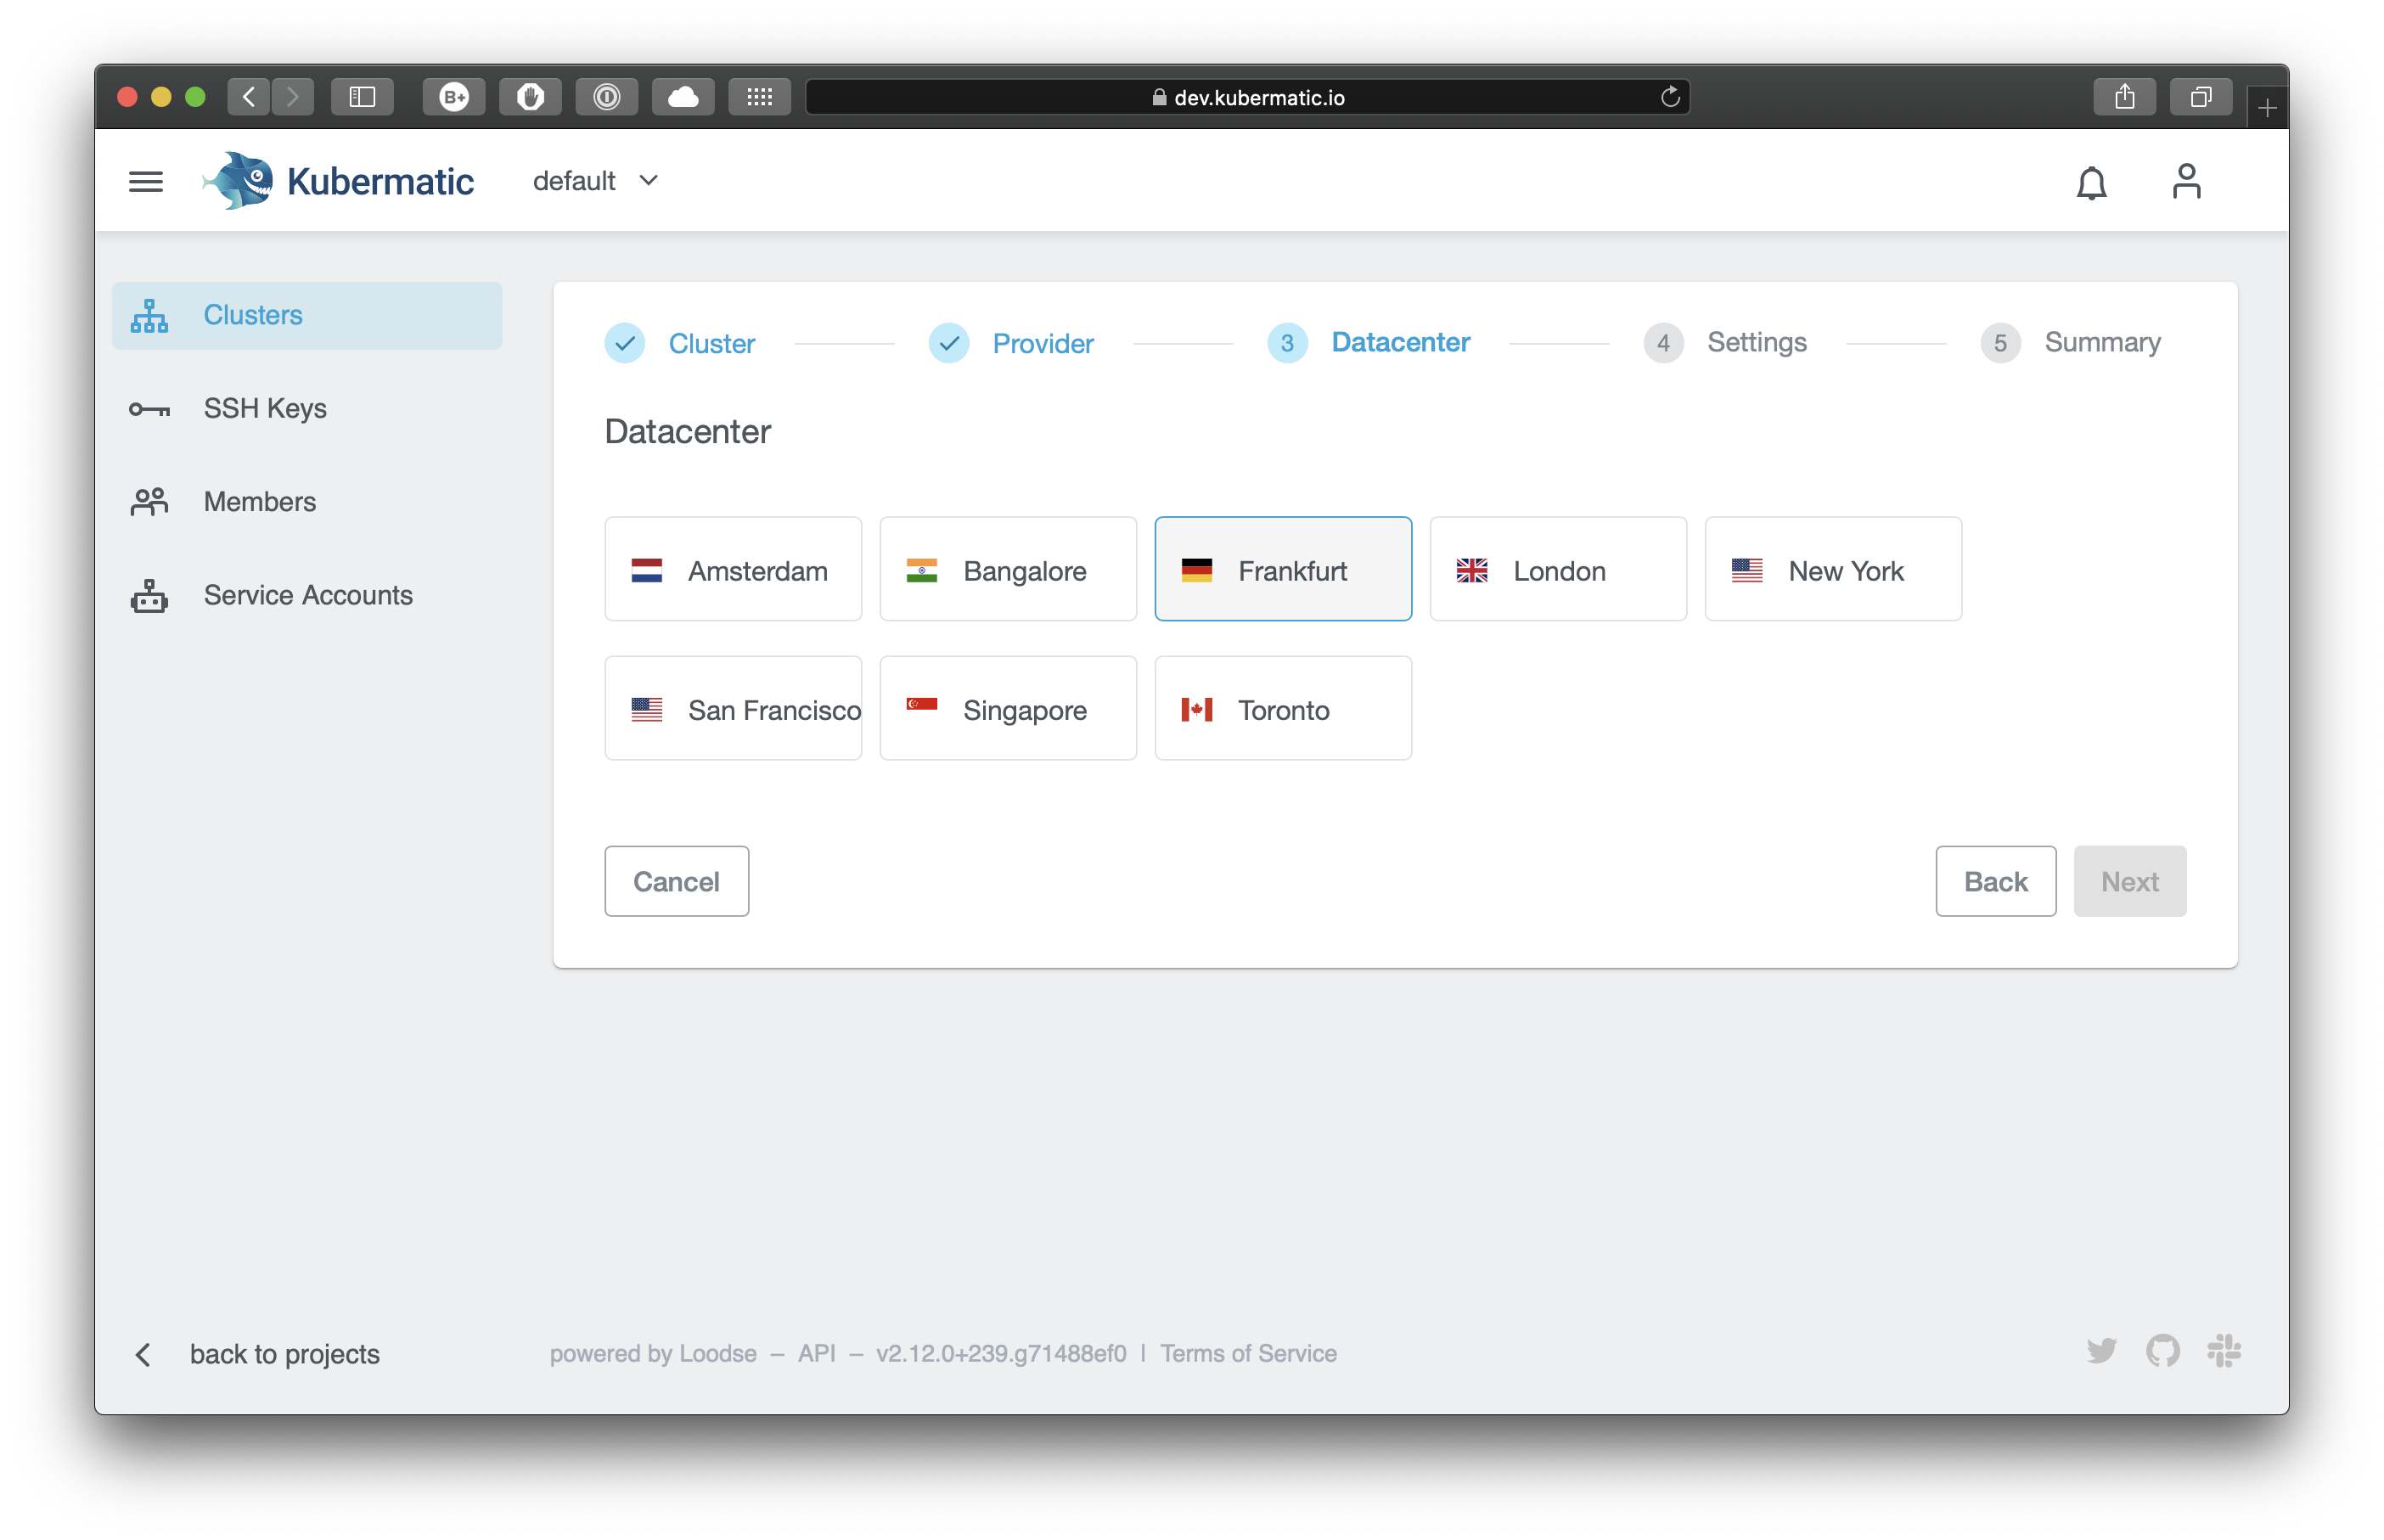
and the datacenter region closest to you:
In the next step of the installer, enter the API token into the Provider credentials field. If you chose DigitalOcean, your view will look like this:
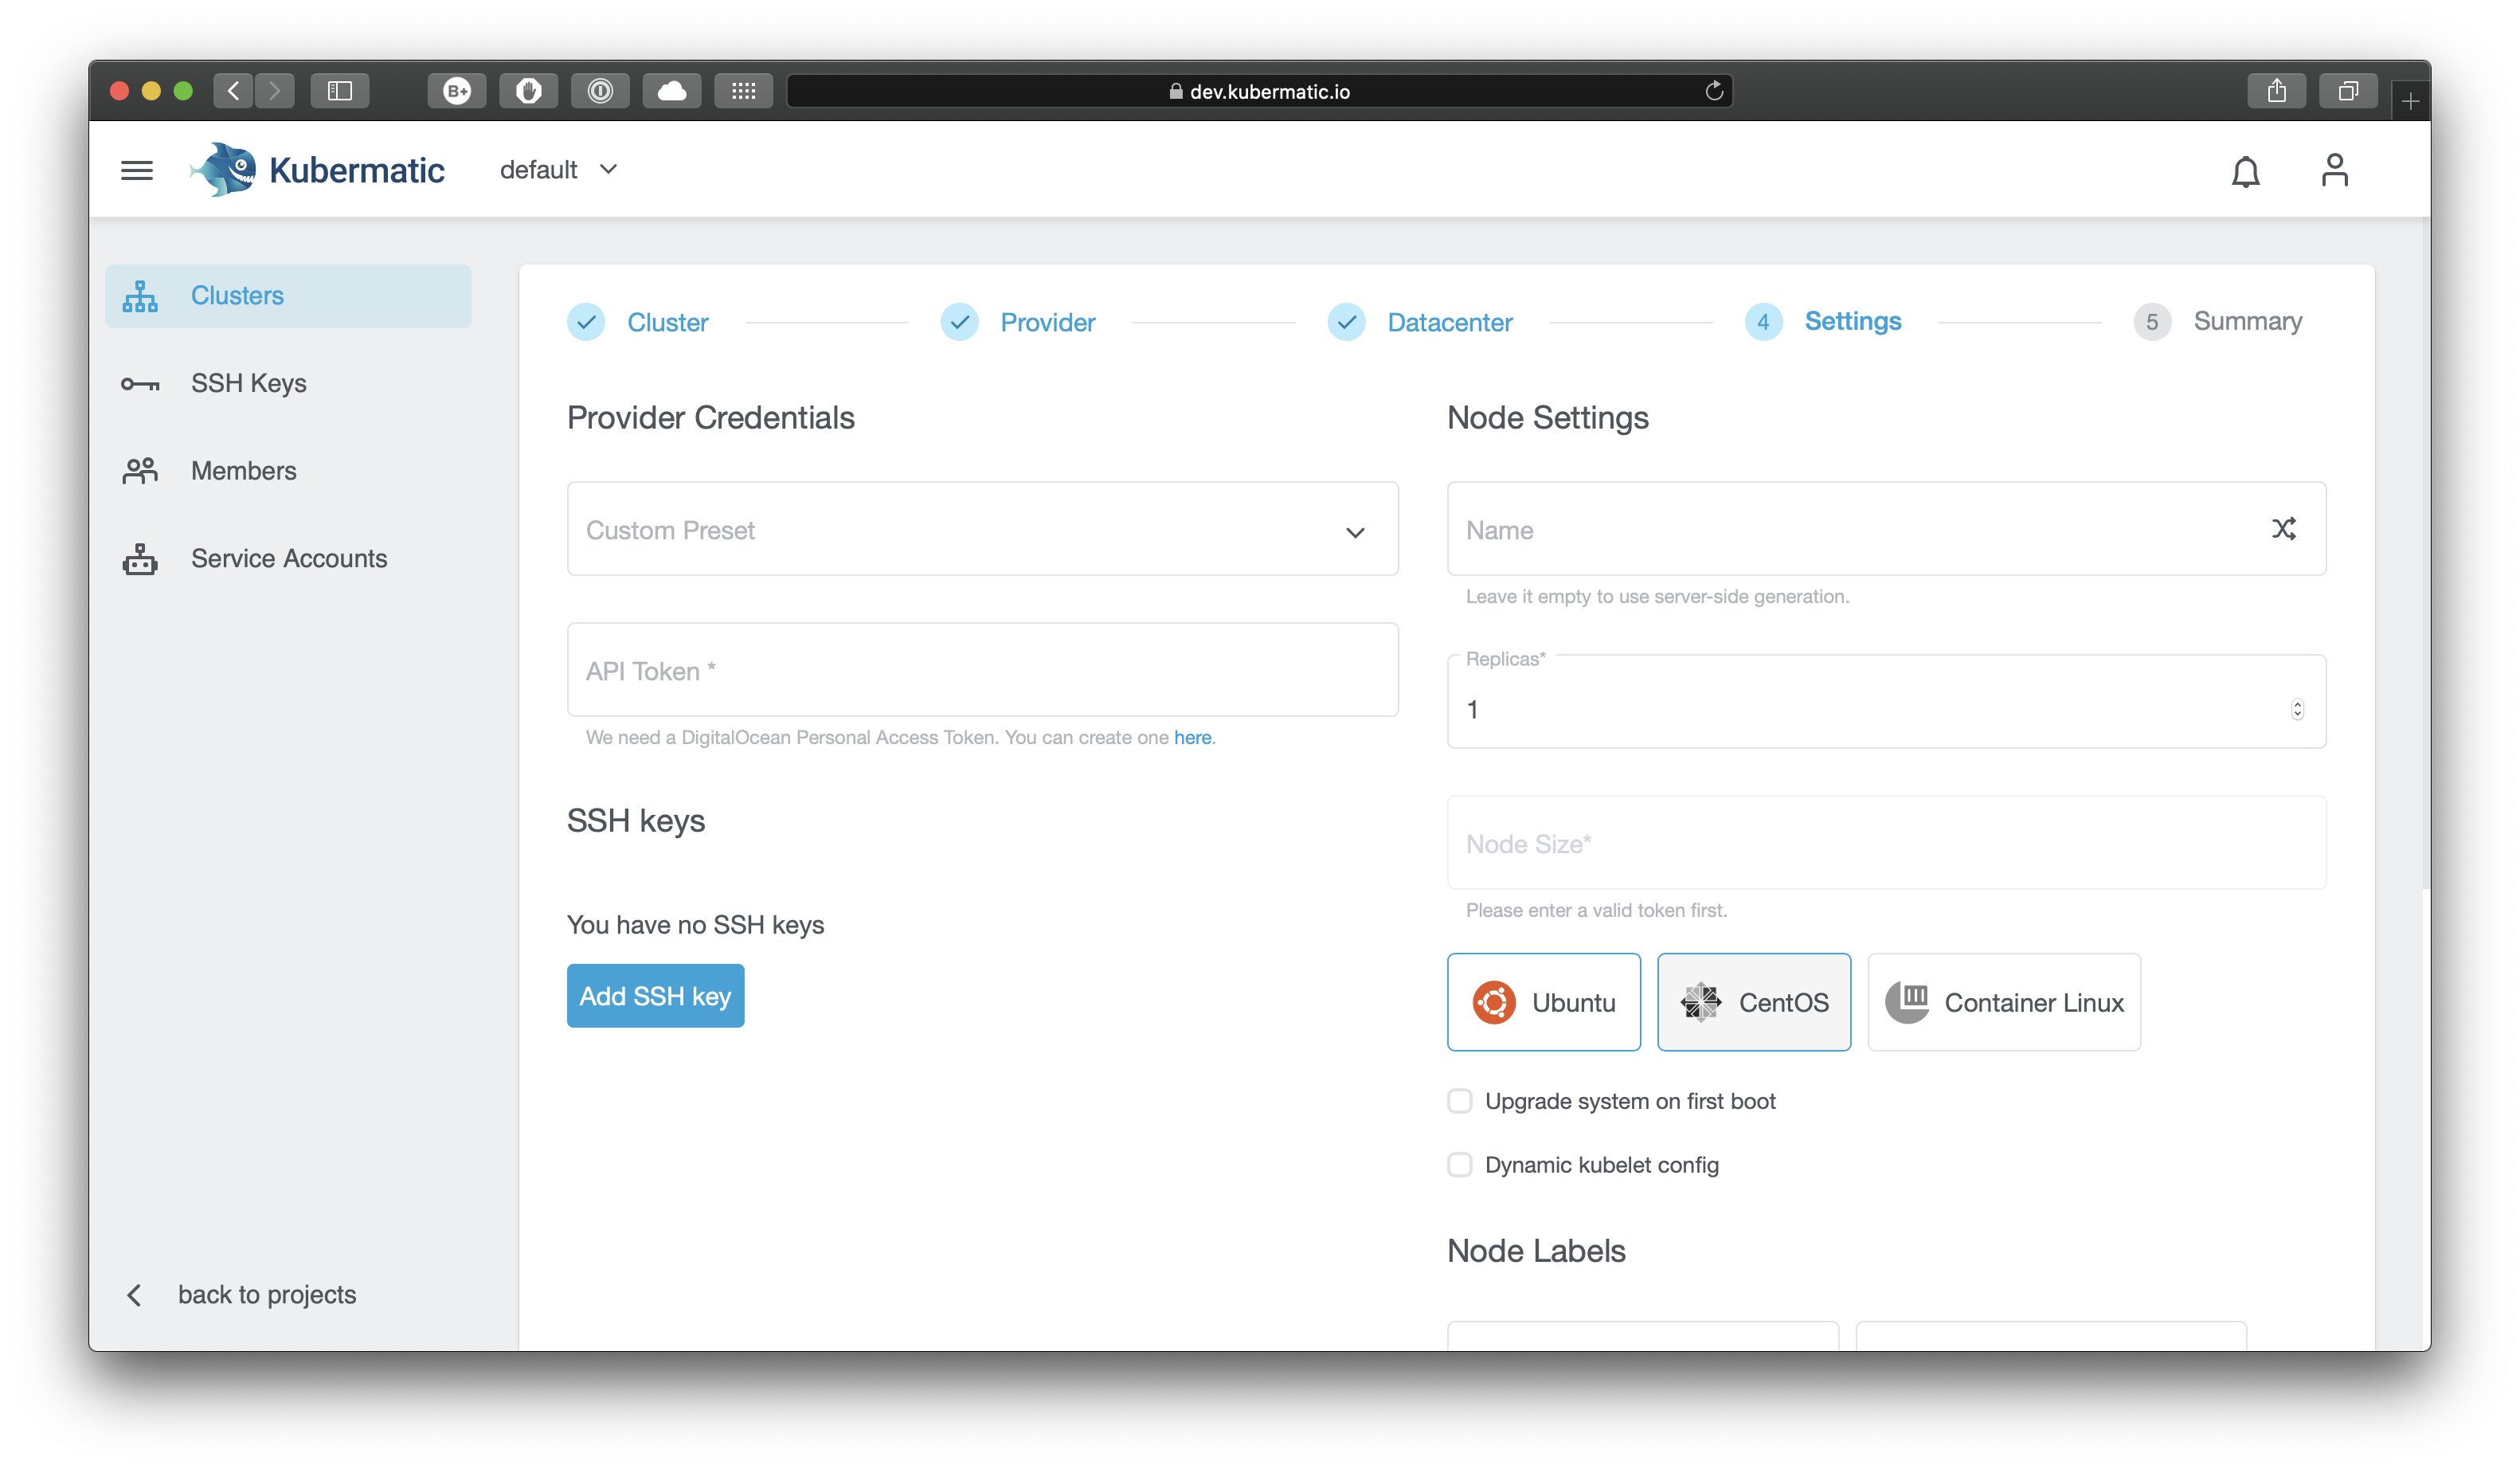
If you entered a valid API token, your node settings will be pre-filled:
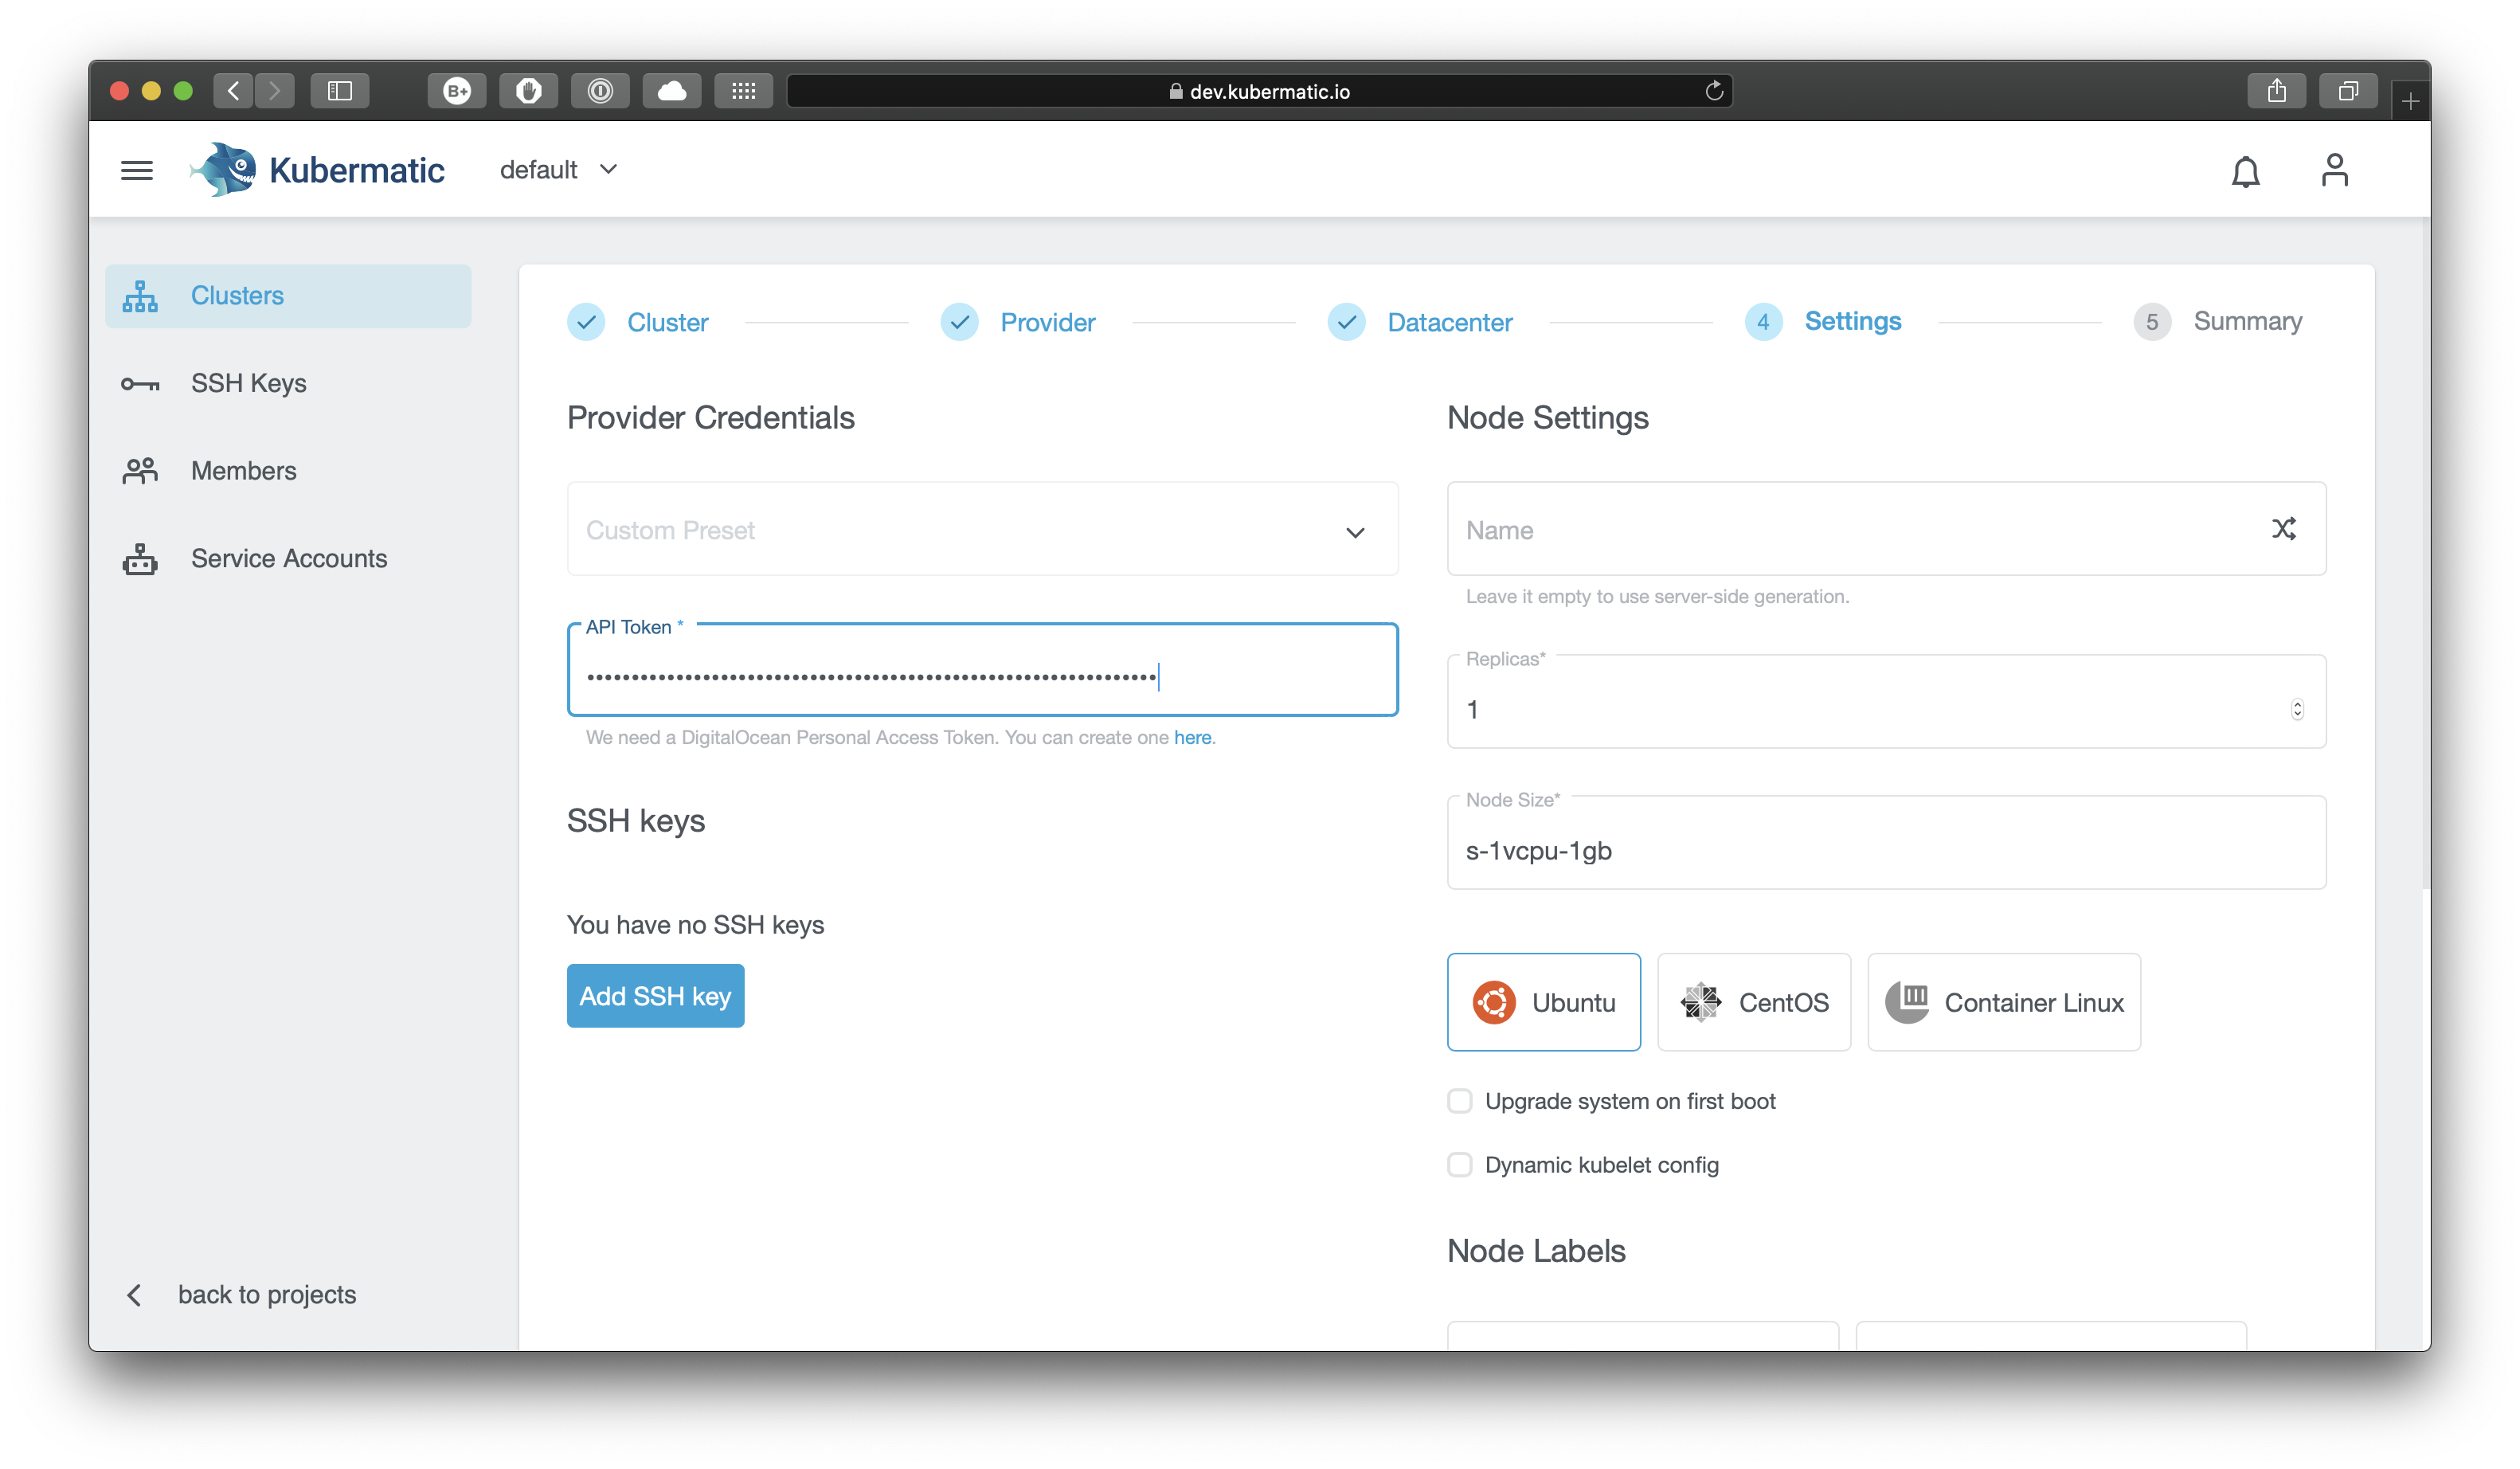
Scroll down to choose or add an SSH key. You can choose one of the keys you already created for the project, or create a new one.
You can assign labels to your nodes. You can also set node taints which is a property that allows your node to repel certain pods.
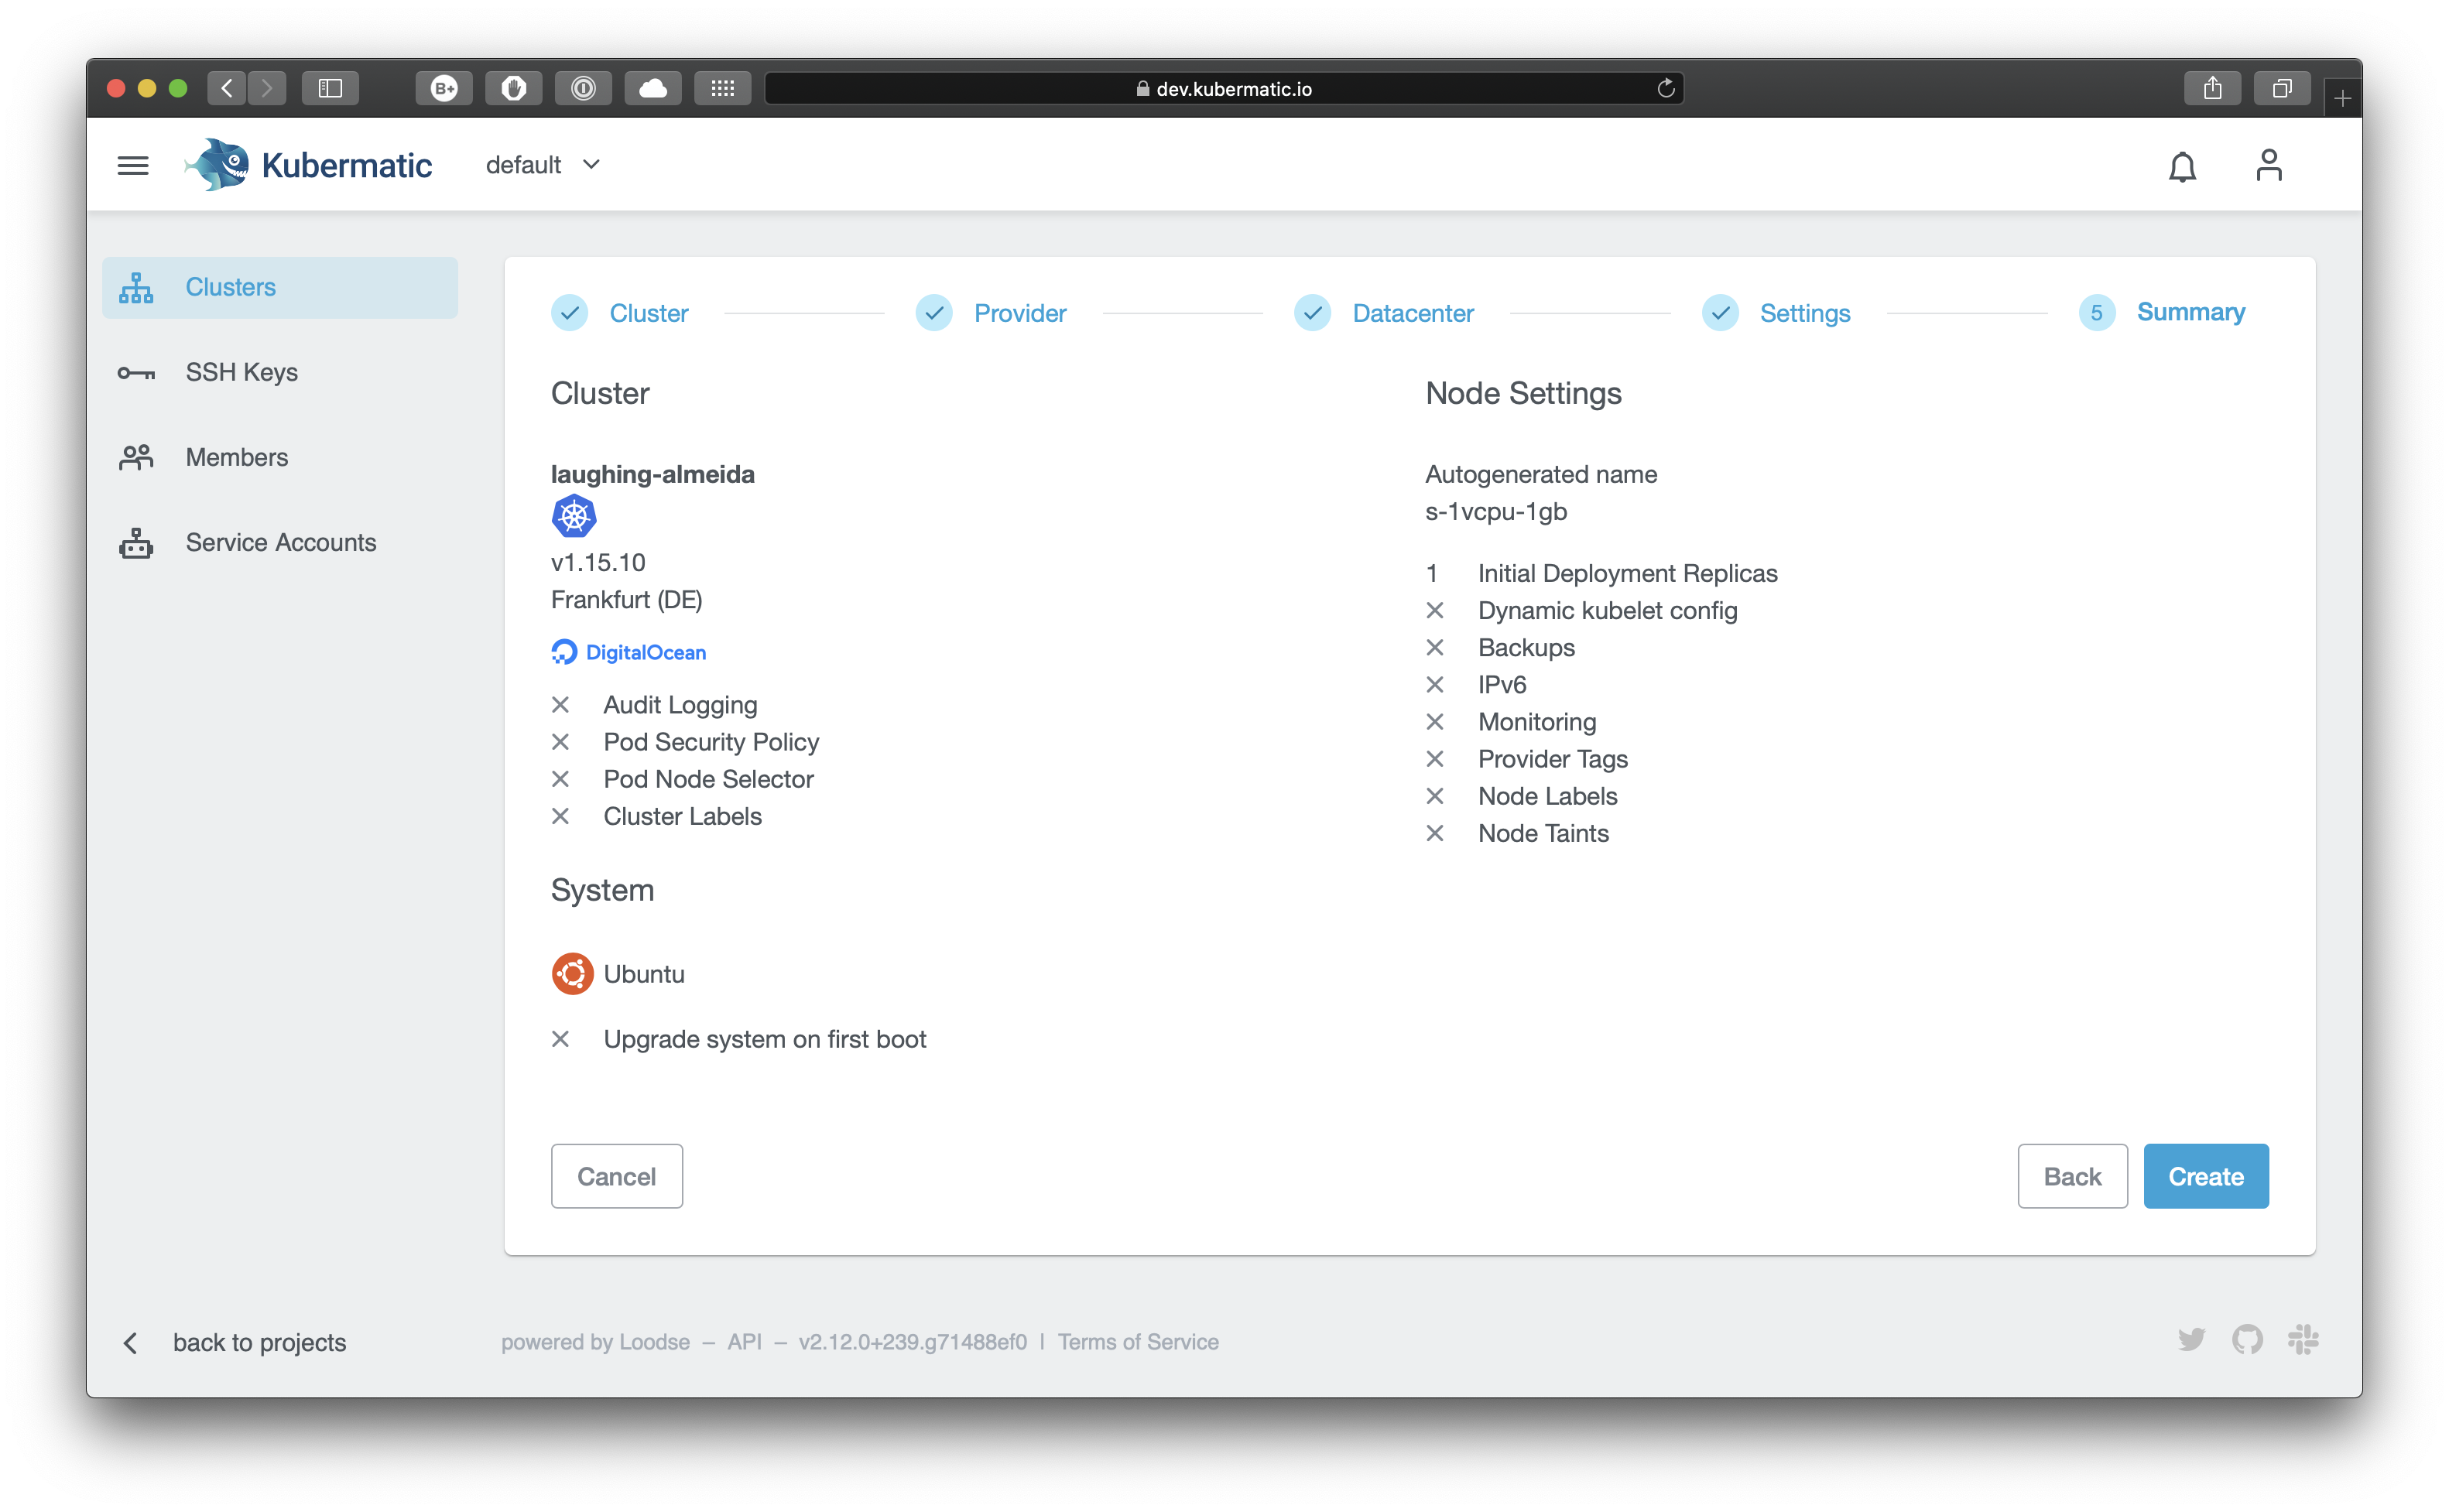
The chosen SSH key will be used for authentication for the default user (e.g. ubuntu for Ubuntu images) on all worker nodes. When you click on Next, you will see a summary and the cluster creation will start after you confirm by clicking Create.
You will then be forwarded to the cluster creation page where you can view the cluster creation process:

After all of the master components are ready, your cluster will create the configured number of worker nodes. Fully created nodes will be marked with a green dot, pending ones with a yellow circle. Clicking on the download icon lets you download the kubeconfig to be able to use kubectl with your cluster.