This guide explains how access control works in Kubermatic Virtualization and how to grant users access to platform resources. It’s written for platform administrators to manage users and permissions
Prerequisites: this only applies in OIDC mode
Kubermatic Virtualization supports three authentication modes, configured at
install time (dashboardAuth.none / .basic / .oidc):
| Mode | Effect on IAM |
|---|---|
| OIDC | Full IAM is active. Each logged-in user’s access is determined by their role bindings, as described below. |
| Basic | Single-admin mode. Anyone who logs in gets full access. Roles and bindings are ignored. |
| None | No login at all. Every request gets full access. Roles and bindings are ignored. |
Everything in this guide — roles, bindings, per-user permissions — only takes effect when the platform is running in OIDC mode. If you’re on Basic or None auth, there’s nothing to configure: every user already has full access.
In OIDC mode, nobody is admin by default — not even the first person to log
in. Basic and None modes auto-seed an admin binding at startup because
there’s only ever one identity to trust. OIDC can authenticate anyone your
identity provider lets through, so the platform never assumes trust: logging
in only creates a User record with zero permissions. Every single grant,
including the very first admin, has to be created explicitly. See
Getting started below.
Getting started: granting your first admin
Follow this once, right after you point the platform at your OIDC provider, to get from “nobody has access” to “one working admin.”
1. Have the intended admin log in once.
Point them at the dashboard and have them complete the OIDC login flow. It
will look like nothing happened — no permissions, empty or forbidden pages.
That’s expected: this step only exists to create their User record.
2. Find their derived username.
The platform names the User object after the local part of their login
email, lowercased (alice@example.com → alice; non [a-z0-9-.]
characters become -). Confirm the exact name with kubectl rather than
guessing:
kubectl -n kubermatic-virtualization get users
3. Grant them the built-in admin role.
As someone with kubectl access to the deployment namespace (e.g. whoever just installed the platform), create a binding:
apiVersion: virtualization.k8c.io/v1alpha1
kind: KubeVRoleBinding
metadata:
  name: alice-admin
  namespace: kubermatic-virtualization
spec:
  subject: alice
  roleRef: admin
kubectl apply -f alice-admin-binding.yaml
Access is immediate — no restart, no re-login. Alice can now use the
platform fully, and can grant everyone else access the same way — either
with her own kubectl access (see
Managing access with kubectl below) or from
the dashboard’s Administration panel (see
The Administration panel below), whichever she
prefers. Bootstrapping the very first admin is the one time kubectl access
is required, since the Administration panel itself only opens once you’re
already an admin.
You don’t strictly need step 1 first — binding matching is by username string, not by an existing
Userobject, so pre-creating the binding before anyone logs in also works as long as you predict the derived name correctly. Logging in first and reading it back withkubectl get usersavoids getting the sanitization rule wrong.
The three building blocks
Access control is built from three objects. All of them live together in the platform’s deployment namespace (the same namespace the dashboard and API server run in) — there’s no separate per-team or per-project namespace to manage.
- User — represents one login identity. Created and kept up to date automatically the first time someone signs in through your OIDC provider; you never create these by hand. A user can be disabled to block sign-in without deleting their history.
- Role (
KubeVRole) — a named, reusable set of permissions. A role is just a list of rules saying “these actions are allowed on these resources.” A role grants nothing by itself until it’s bound to someone. - Role Binding (
KubeVRoleBinding) — grants one role to one user. This is the only object that actually gives a person access. One user can hold multiple bindings (e.g.viewerplus a customvm-operatorrole); their effective permissions are the union of everything they’re bound to.
Two roles are built in and always present:
| Role | Grants |
|---|---|
admin | Every action on every resource. Cannot be edited or deleted. |
viewer | Read-only (view + list) on every resource. Cannot be edited or deleted. |
Everything else — day-to-day access for real users — is expressed with custom roles you create yourself.
How a permission rule reads
Each role’s rules list is made of entries with three parts:
{
  "resourceGroups": ["networking"],
  "resources": ["subnets"],
  "verbs": ["view", "list"]
}
Read it as: “on resources named subnets, in the networking group, allow
view and list.” Leaving a field empty, or using ["*"], means “match
anything” for that field. So {"verbs": ["*"]} with no other fields set — as
the built-in admin role uses — matches every group, every resource, every
verb.
Verbs you can grant: create, delete, update, view, list,
manage (full lifecycle without implying read), start, stop, restart,
console. Not every resource supports every verb — see the table below.
Resource groups and resources:
| Group | Resources | Verbs available |
|---|---|---|
compute | virtualmachines | list, view, create, delete, update, start, stop, restart, console |
compute | virtualmachineinstancemigrations | list, view, create, delete |
compute | virtualmachinepools | list, view, create, delete, update |
compute | horizontalpodautoscalers | list, view, create, delete, update |
storage | datavolumes | list, view, create, delete, update |
networking | vpcs | list, view, delete, update (create is admin-only — see below) |
networking | subnets, underlaysubnets, securitygroups, natgateways, elasticips | list, view, create, delete, update |
networking | services, networkpolicies | list, view, create, delete, update |
system | sshkeys, images | list, view, create, delete, update |
system | configmaps, secrets | list, view, create, delete, update |
iam | users | create, delete, update, view, manage |
iam | kubevroles | create, delete, view |
iam | kubevrolebindings | create, delete, view, manage |
Admin-only verbs: a handful of actions (currently: creating a vpcs)
are reserved for the built-in admin role and can’t be granted through a
custom role, even with ["*"].
Managing access with kubectl
User, KubeVRole, and KubeVRoleBinding are plain namespaced Kubernetes
objects — you manage access the same way you’d manage any other Kubernetes
resource, with kubectl apply/get/delete. Everything lives in the
platform’s deployment namespace.
kubectl -n kubermatic-virtualization get users
kubectl -n kubermatic-virtualization get kubevroles
kubectl -n kubermatic-virtualization get kubevrolebindings
Create a custom role
Example — a “VM operator” who can fully manage VMs and see networking, but not touch it:
apiVersion: virtualization.k8c.io/v1alpha1
kind: KubeVRole
metadata:
  name: vm-operator
  namespace: kubermatic-virtualization
spec:
  displayName: VM Operator
  description: Full VM lifecycle, read-only networking
  rules:
    - resourceGroups: ["compute"]
      verbs: ["*"]
    - resourceGroups: ["networking"]
      verbs: ["view", "list"]
kubectl apply -f vm-operator-role.yaml
Bind the role to a user
This is the step that actually grants access. spec.subject is the User
object’s name; spec.roleRef is the KubeVRole’s name. Both must already
exist in the same namespace.
apiVersion: virtualization.k8c.io/v1alpha1
kind: KubeVRoleBinding
metadata:
  name: alice-vm-operator
  namespace: kubermatic-virtualization
spec:
  subject: alice
  roleRef: vm-operator
kubectl apply -f alice-vm-operator-binding.yaml
A user can hold as many bindings as needed — grant viewer platform-wide and
layer vm-operator on top with a second KubeVRoleBinding, for example.
Changes take effect immediately; there’s no restart or re-login required.
To revoke access, delete the binding, not the role:
kubectl delete kubevrolebinding alice-vm-operator -n kubermatic-virtualization
Inspect what a user can do
There’s no single “effective permissions” object — list the bindings for a user, then read each referenced role’s rules:
kubectl -n kubermatic-virtualization get kubevrolebindings -o jsonpath='{range .items[?(@.spec.subject=="alice")]}{.spec.roleRef}{"\n"}{end}'
kubectl -n kubermatic-virtualization get kubevrole vm-operator -o yaml
Disable a user
kubectl -n kubermatic-virtualization patch user alice --type=merge -p '{"spec":{"disabled":true}}'
A disabled user’s session is rejected immediately — no need to also remove
their bindings, though doing so keeps things tidy. Deleting the User
object entirely also removes their bindings and provisioned ServiceAccount.
A note on the system roles
admin and viewer are seeded once, at platform start-up. The platform’s
own dashboard/API layer refuses to edit or delete them — but that check does
not exist at the Kubernetes level, so a kubectl edit/kubectl delete
against kubevrole admin or kubevrole viewer directly will succeed and
won’t be reverted until the platform restarts. Treat both as reserved and
manage access through bindings and custom roles instead.
The Administration panel
Everything in the previous section can also be done from the dashboard, without touching kubectl at all. Any admin sees an Administration entry from the main console, with three tabs: Users, Bindings, and Roles.
Users
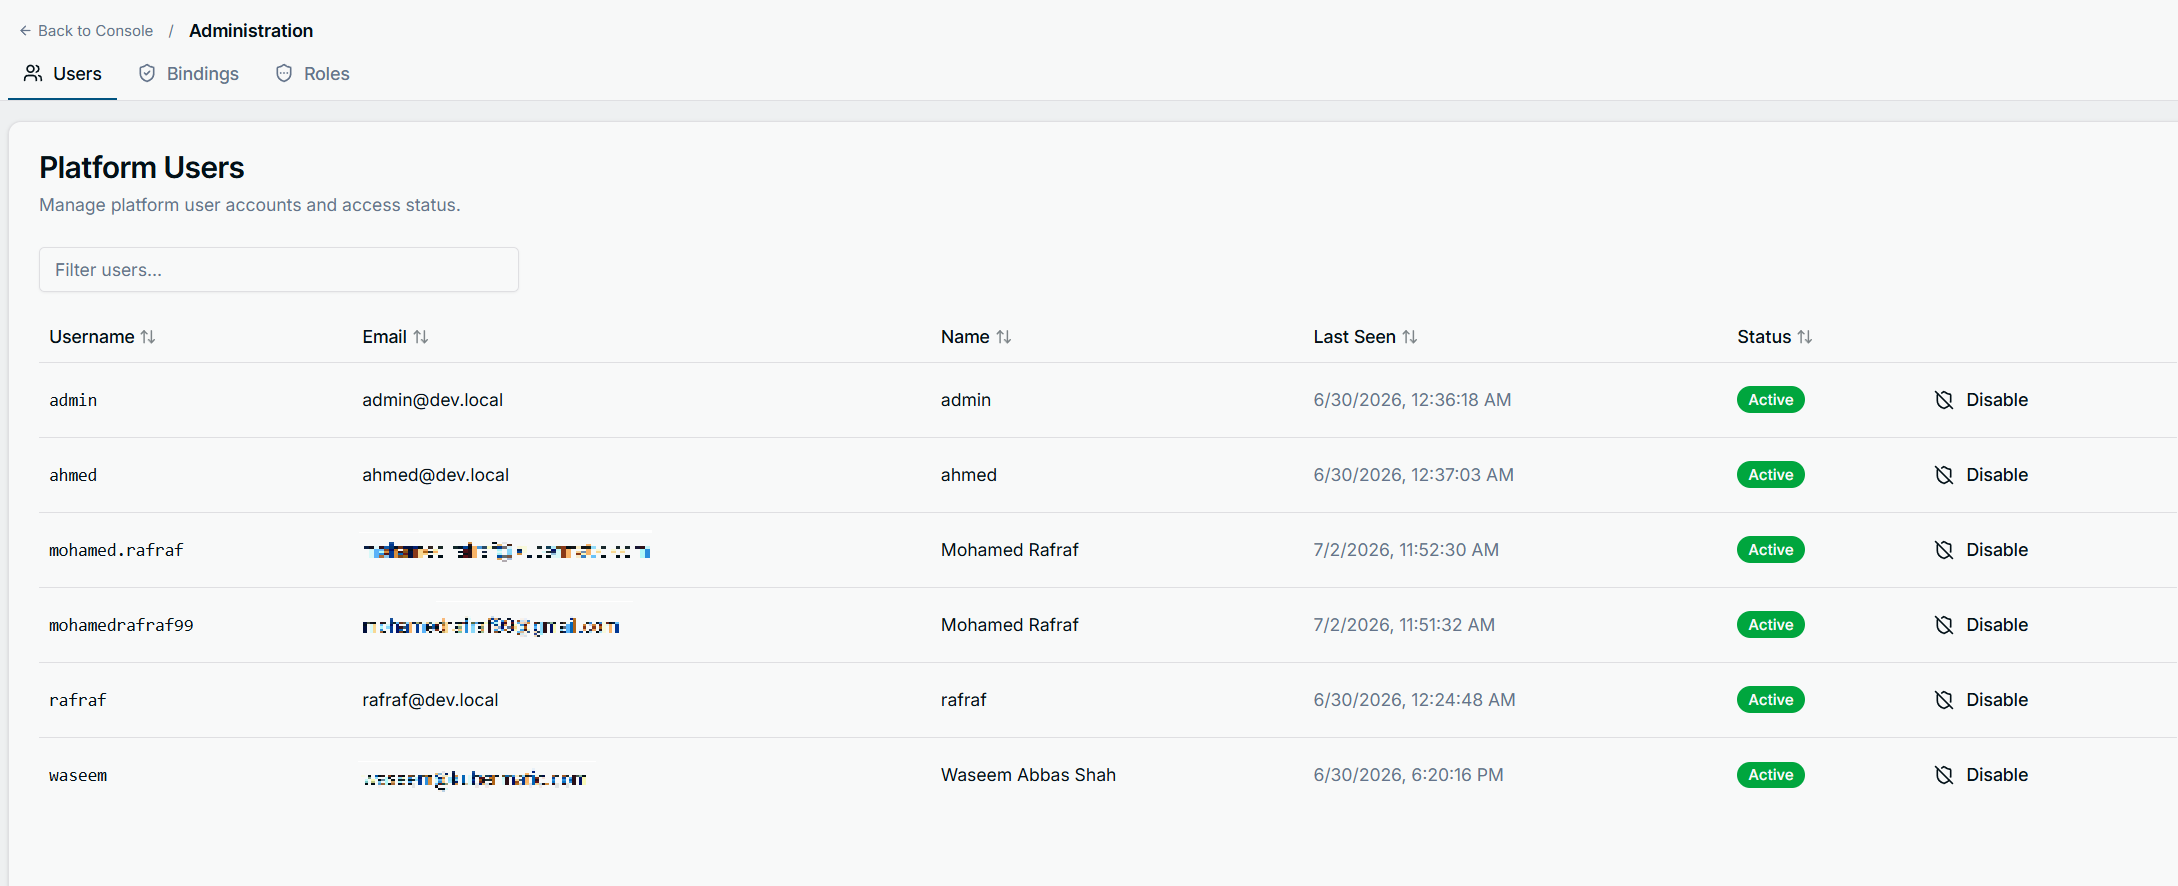
A table of every User on the platform — username, email, display name,
last-seen timestamp, and status. This is the UI for exactly what the kubectl
workflow above does by hand: the Disable button next to a user is the
same spec.disabled flag set by kubectl patch user ... disabled:true, and
disabling here takes effect immediately, same as via kubectl.
Roles
The Roles tab lists every KubeVRole. Built-in roles (admin, viewer)
carry a System badge and only offer a view icon — no edit or delete —
matching the restriction described earlier: the dashboard won’t let you
touch them, even though kubectl technically can. Custom roles get view, edit,
and delete actions instead.
New Role opens a form that builds a KubeVRoleSpec visually instead of
as YAML:
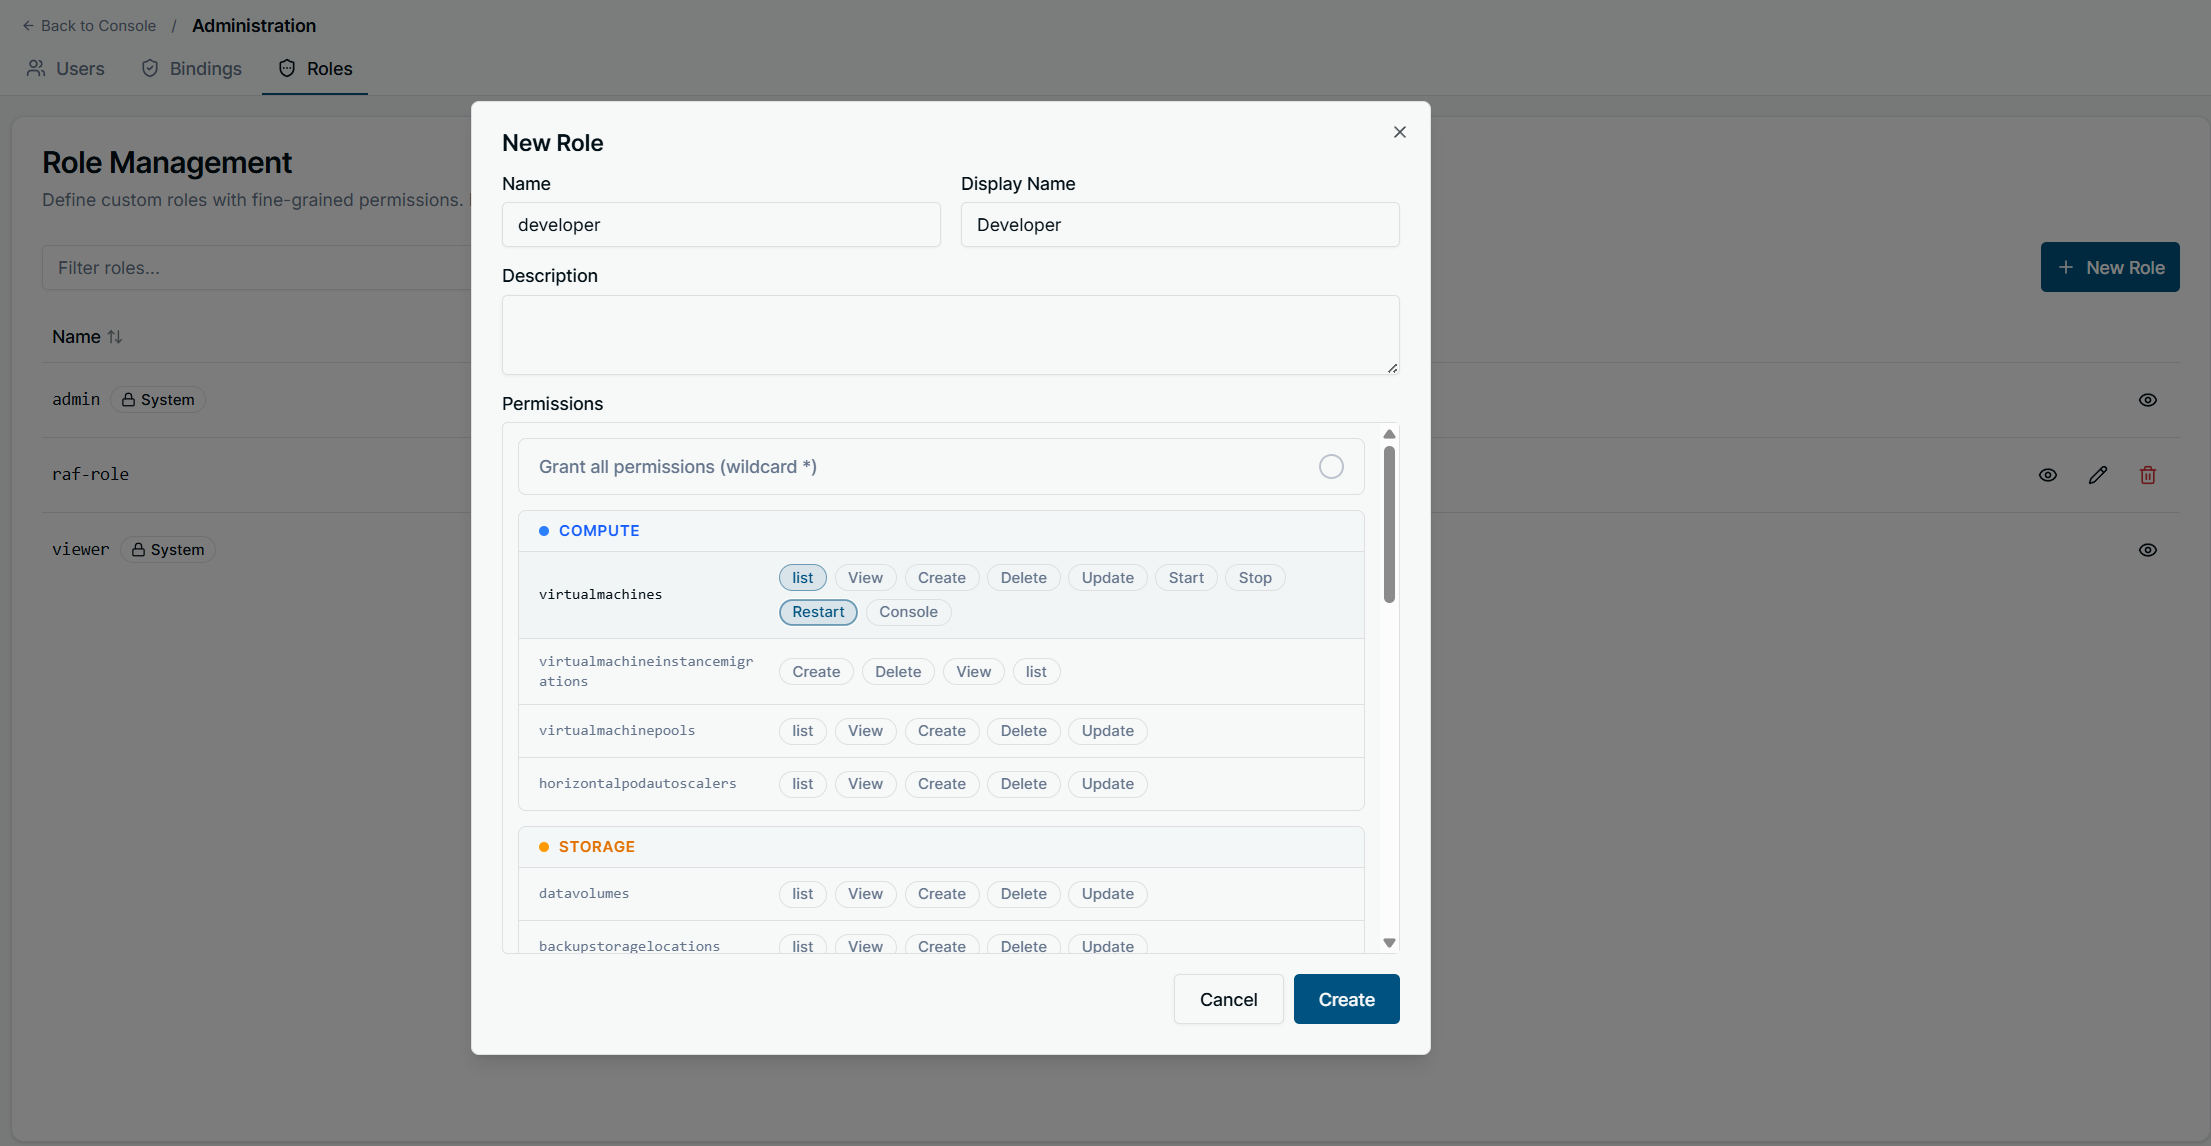
- Name / Display Name / Description map directly to the
matching
KubeVRoleSpecfields. - Grant all permissions (wildcard *) is the UI equivalent of a rule with
verbs: ["*"]and noresourceGroups/resourcesrestriction — the same full-access rule the built-inadminrole uses. Leave it off to build a scoped role instead. - Below it, every resource is grouped by category (Compute, Storage,
Networking, System, IAM — the same groups from the
resource groups and resources table), with
one pill per verb that resource supports. Clicking a verb pill for
virtualmachinesunder Compute, for instance, is equivalent to adding{resourceGroups: ["compute"], resources: ["virtualmachines"], verbs: [...]}tospec.rules. Admin-only verbs (like creating avpcs) simply don’t appear here — there’s nothing to accidentally grant.
The Bindings tab is where a User and a KubeVRole get connected — the
dashboard equivalent of applying a KubeVRoleBinding.
What users see without the right permission
When a user opens a page or resource their bound roles don’t cover, they get a dedicated screen rather than a broken page or a raw error:
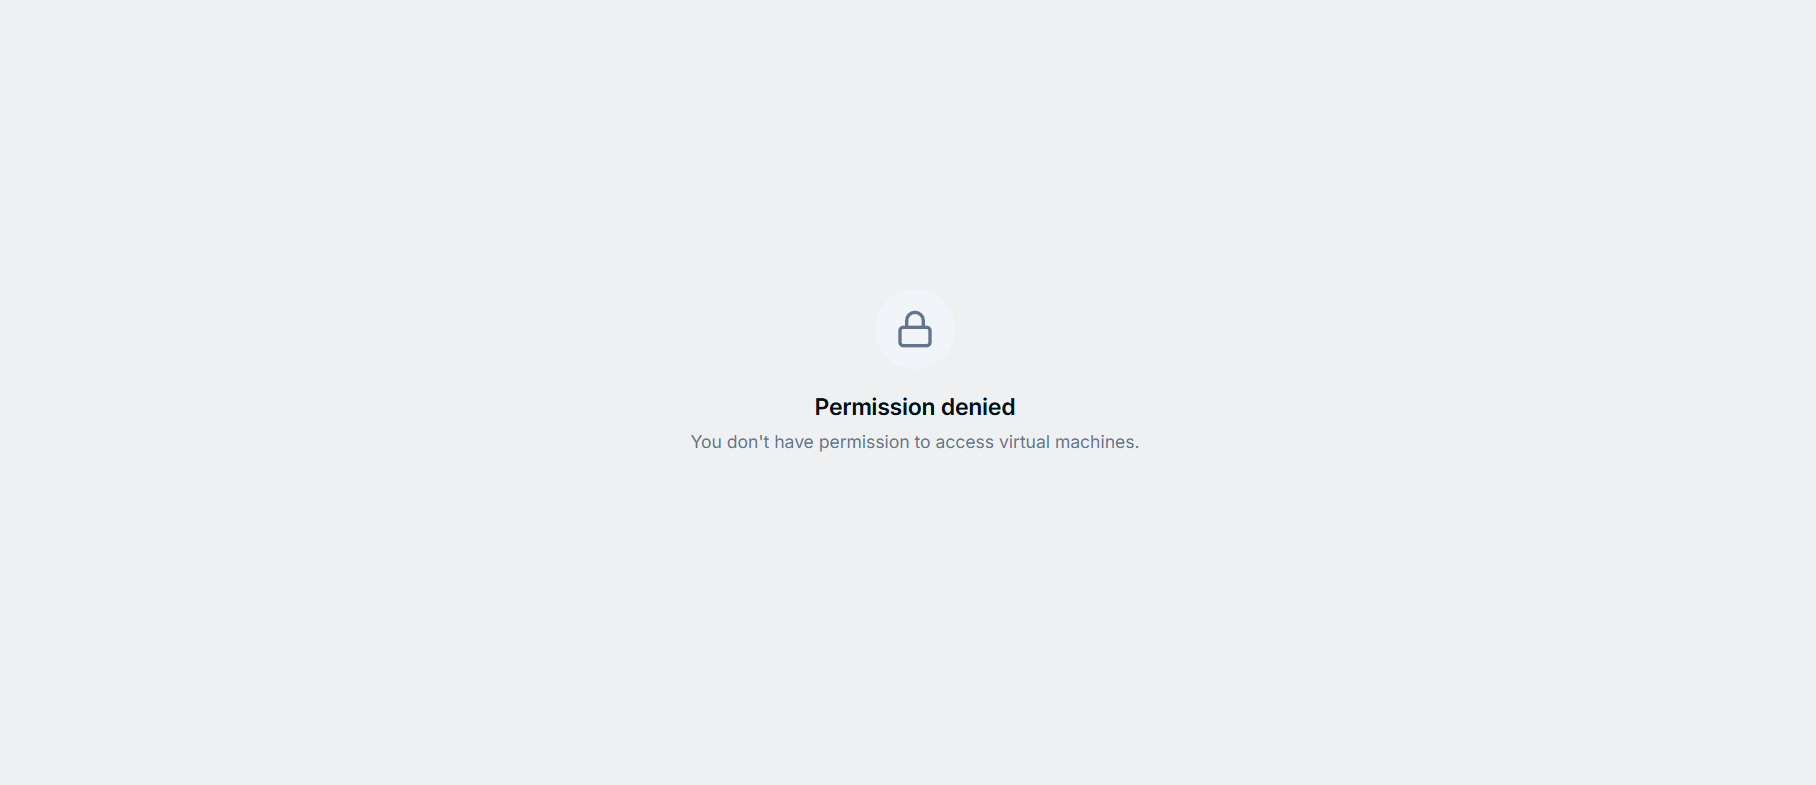
This is what a user with, say, only the viewer role but no compute grant
would see on the Virtual Machines page — or what anyone sees the moment a
view/list verb for that resource isn’t present in any role they’re bound
to. It’s the same authorization check either way, whether the request came
from the dashboard or from kubectl — the dashboard just renders it as a
page instead of returning a Kubernetes Forbidden error.
kubectl access for end users
Each User gets a dedicated ServiceAccount that the platform keeps
synchronized with a native Kubernetes Role/RoleBinding mirroring their
KubeVRoleBindings. Users download a personal kubeconfig for that
ServiceAccount from the platform’s login session. In practice this means:
whatever a user is granted through KubeVRoleBindings is exactly what their
kubectl token can do — no separate Kubernetes RBAC to configure. Change a
binding, and the next kubectl call reflects it immediately.
Good practices
- Grant through bindings, not by editing
admin/viewer. Those two are fixed on purpose so there’s always a known-good full-access and read-only role available — and, per the note above, nothing at the cluster level stops you from breaking that guarantee if you edit them directly. - Prefer several narrow roles over one broad one.
viewer+vm-operatorcomposes cleanly and is easier to reason about than a single custom role that tries to cover everything. - Use
resourceGroupsalone for broad grants, addresourcesto narrow them.{resourceGroups: ["compute"], verbs: ["view"]}covers every current and future compute resource; pin downresourcesonly when you need to exclude something in the group. - Disable, don’t delete, departing users if you want to preserve audit history.